How to Sync Nextcloud Calendar and Contacts with Thunderbird (CalDAV & CardDAV)
Fairooza
This guide explains how to sync Nextcloud with Thunderbird using CalDAV for calendars and CardDAV for contacts. The steps are the same on macOS and Windows, and no extra add-ons are required for modern versions of Thunderbird.
Before you start, make sure Thunderbird is installed on your system and that you have access to your Nextcloud account.
Synchronize Nextcloud with Thunderbird
Thunderbird is a stable, well-established desktop client that many people use as a lightweight personal information manager for email, calendars, and contacts. When paired with Nextcloud, it becomes a very practical setup for day-to-day work.
From Thunderbird version 102 and newer, syncing with Nextcloud became much more easier. Calendar and contact synchronization works out of the box using CalDAV and CardDAV, without relying on any third-party add-ons. Thunderbird can automatically discover the calendars and address books available on your Nextcloud account and keep them in sync on both macOS and Windows.
This makes the synchronization more reliable and easier to maintain.
Sync Nextcloud Contacts with Thunderbird (CardDAV Setup)
For syncing contacts, you don’t need to finish email setup in Thunderbird, and you also don’t need any add-ons. Thunderbird supports native CardDAV contact sync and the steps are the same on macOS and Windows.
When you open Thunderbird, it shows the Account Setup screen for email. You can safely close this tab.
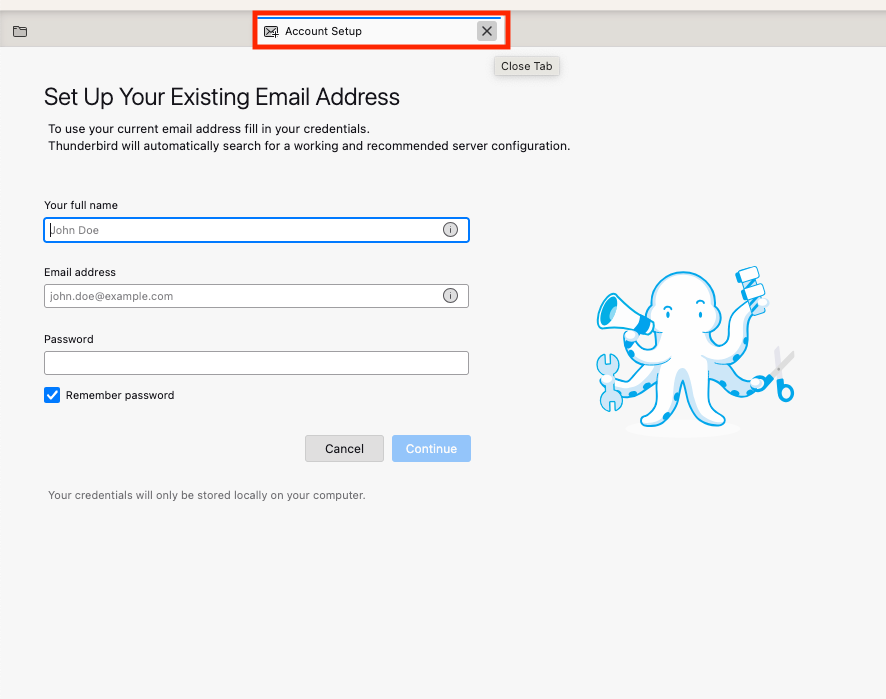
Once closed, you will land on Thunderbird’s main interface.
From the left sidebar, click Address Book (the second icon from the top).

By clicking the "Create a new address book" icon, you will get the following popup:
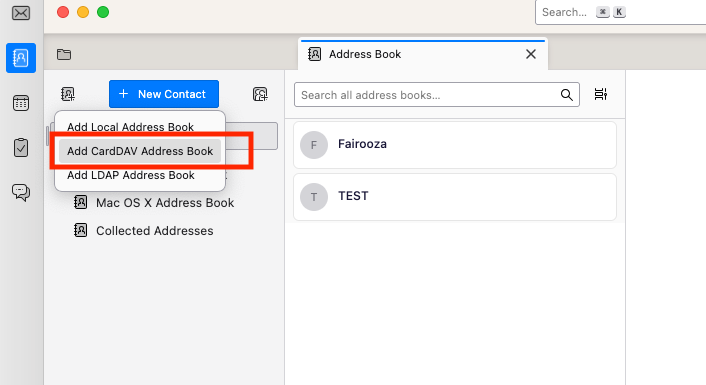
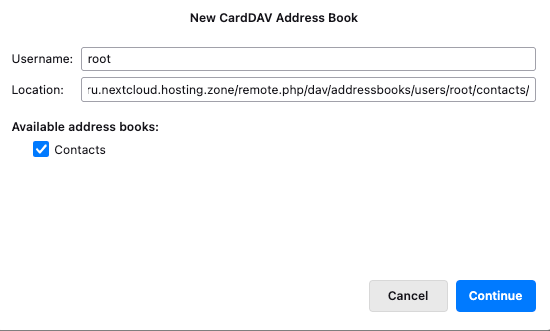
Now, choose "Add CardDAV Address Book". This opens the New CardDAV Address Book popup:
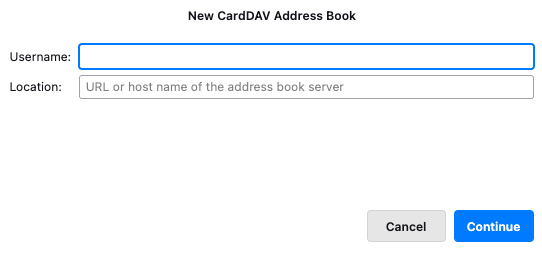
Here, enter your Nextcloud CardDAV details. You will see two fields:
- •Username - your Nextcloud username
- •Location - your Nextcloud CardDAV URL
You can get the "Location" URL directly from your Nextcloud. To find the correct CardDAV link, open Nextcloud. Select the "Contacts" icon.
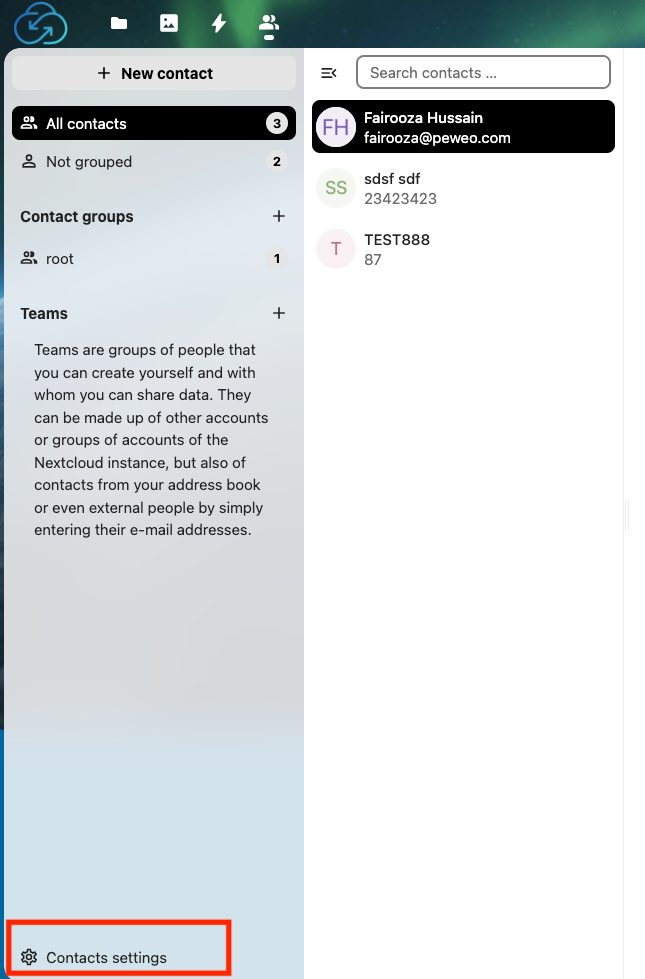
Click "Contacts settings" (bottom-left). Then a popup will appear:
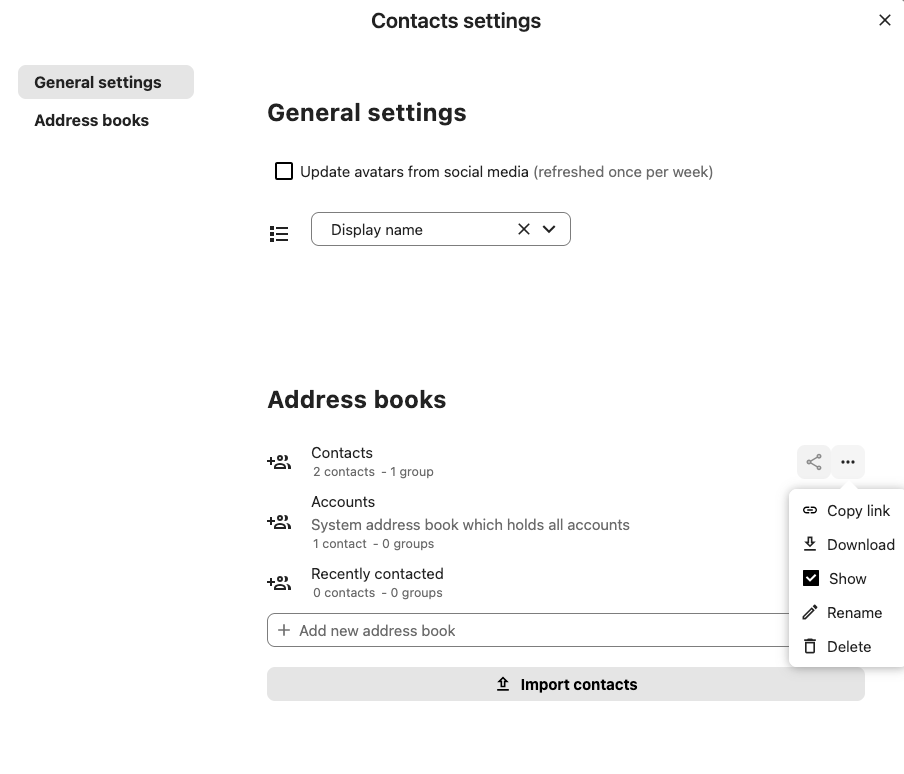
Under Address books, find "Contacts" and Click the three-dot menu. Select "Copy link". This copies the exact CardDAV URL for your address book.
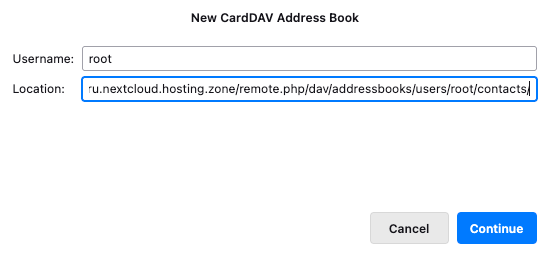
Paste this link into the Location field in Thunderbird, then click "Continue".
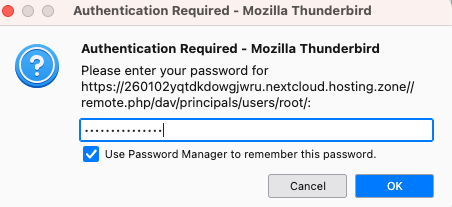
Now you need to authenticate with your Nextcloud account. An authentication popup will appear:
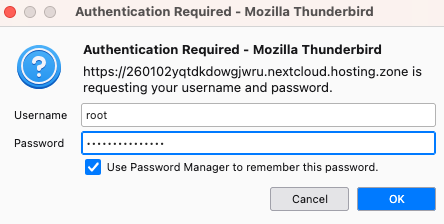
Here, enter your Nextcloud username and password (or app password, if used). if you want Thunderbird to remember the password, enable "Use Password Manager to remember this password". And click "OK".
Thunderbird will now show a list of available address books:
You should see Contacts listed there. Click "Continue".
Thunderbird will now finish setting up the CardDAV connection and start syncing your contacts automatically. If you see Contacts listed in the left sidebar of Thunderbird and your contact entries appear in the main panel, the sync is complete.
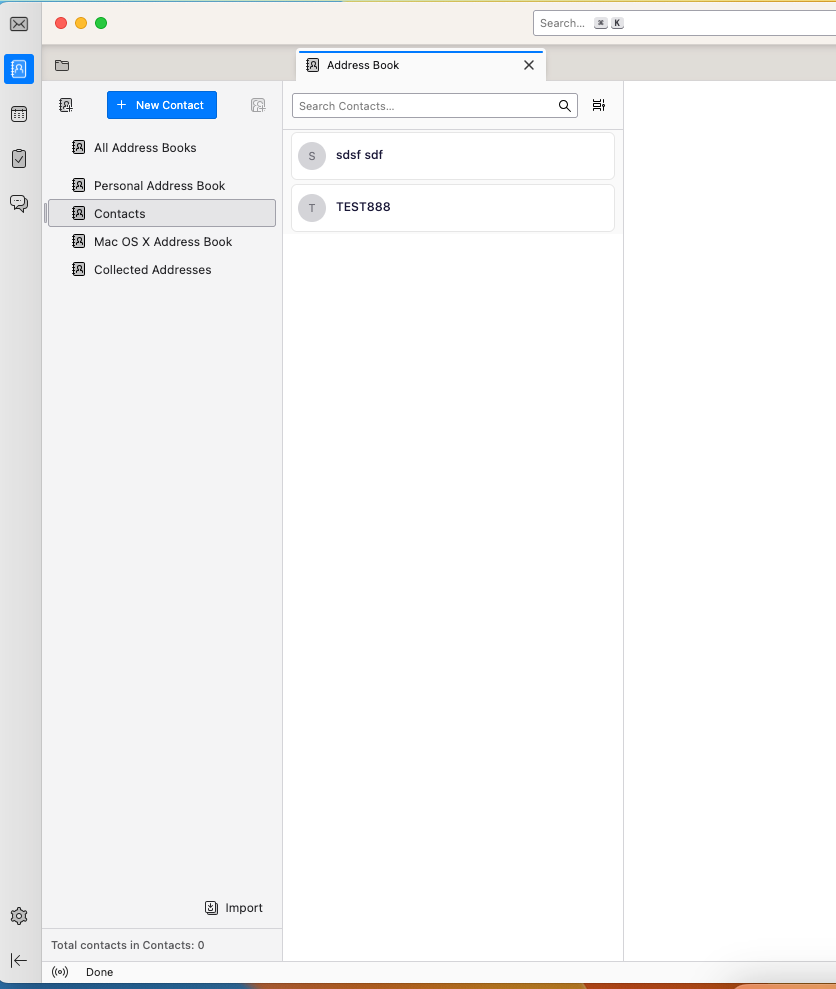
That’s it, the Nextcloud contacts are now synced into Thunderbird using CardDAV.
Any contact you add, edit, or delete in Nextcloud will appear in Thunderbird, and changes made in Thunderbird will automatically sync back to Nextcloud.
This is the recommended and cleanest way to sync contacts between Nextcloud and Thunderbird on both macOS and Windows.
Sync Nextcloud Calendar with Thunderbird (CalDAV Setup)
Now, let's look at how to sync your Nextcloud calendar with Thunderbird using CalDAV. The initial steps are the same as in the contact syncing section above. If Thunderbird shows the email Account Setup screen, you can simply close it to access the main interface.
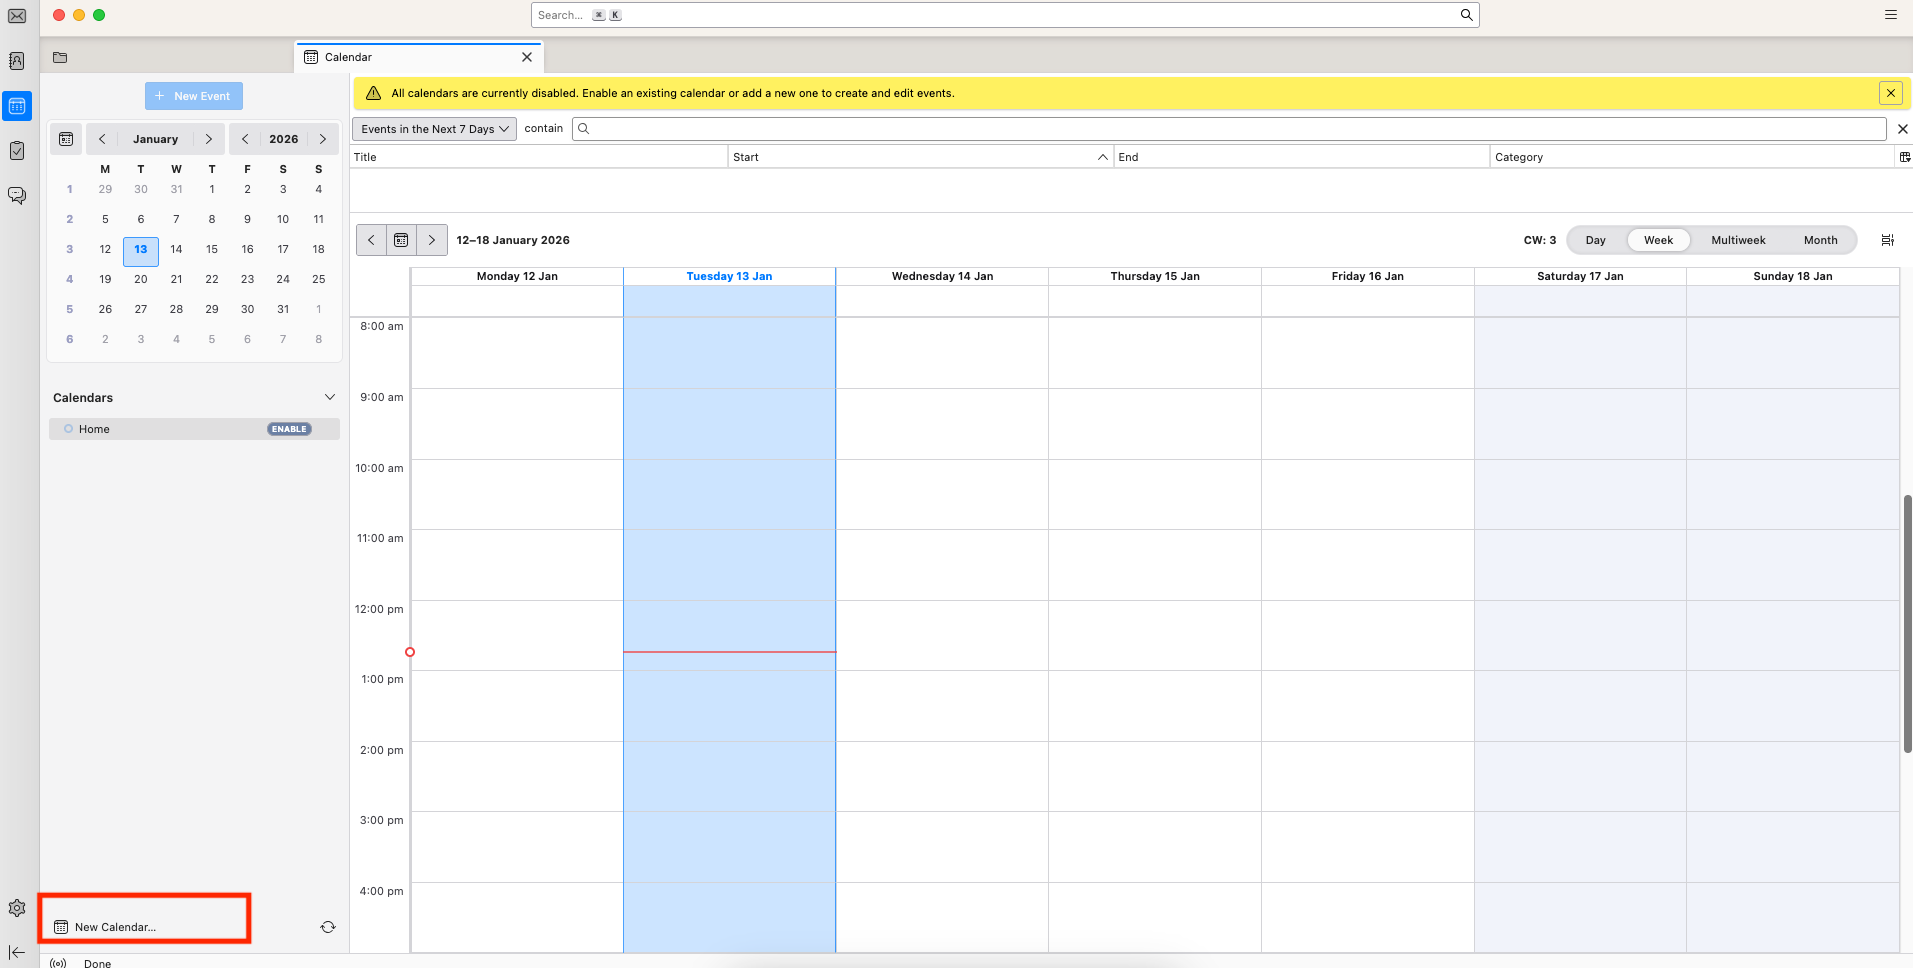
Once closed, you land on Thunderbird’s main interface. From the left sidebar, click "Calendar" (the calendar icon):
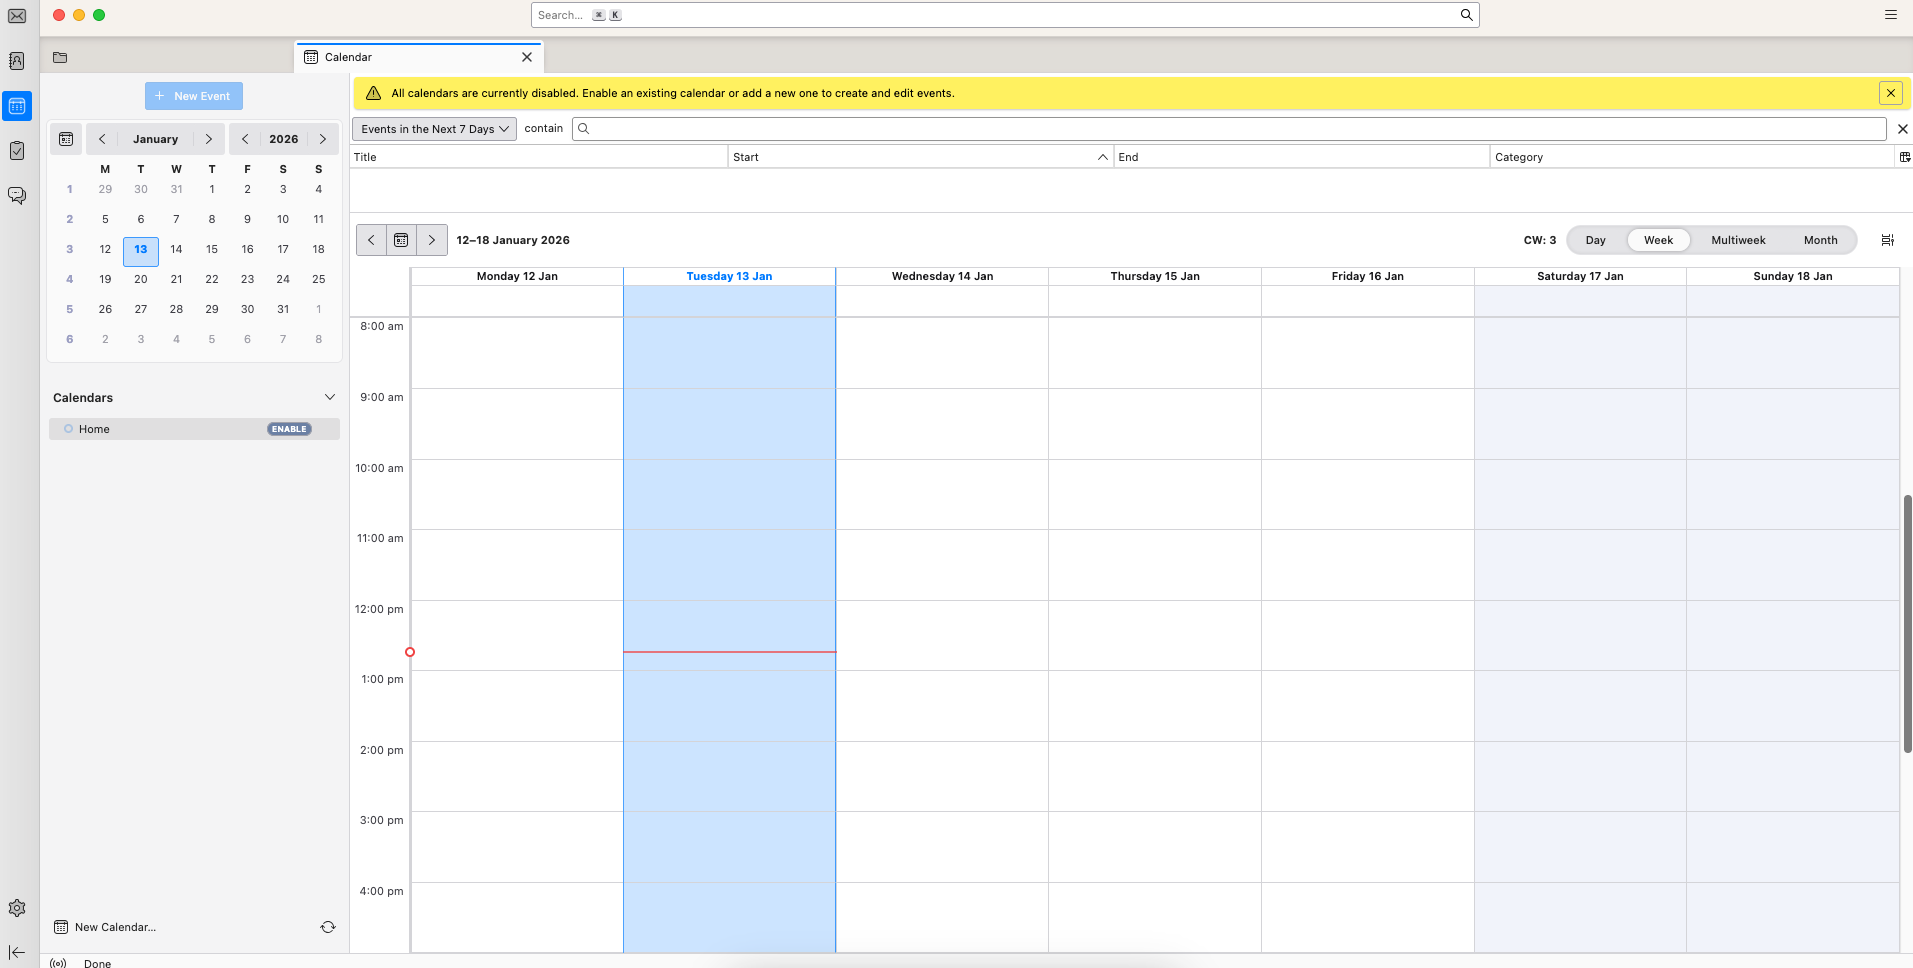
In the Calendar view, click "New Calendar…".
A popup will appear. Select "On the Network" and click "Next":
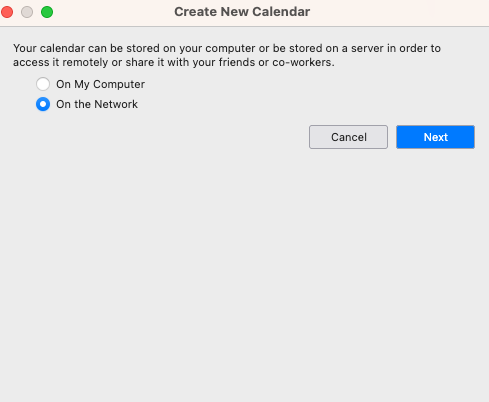
This actually tells Thunderbird that you want to connect to a calendar hosted on a server.
You will now be asked for:
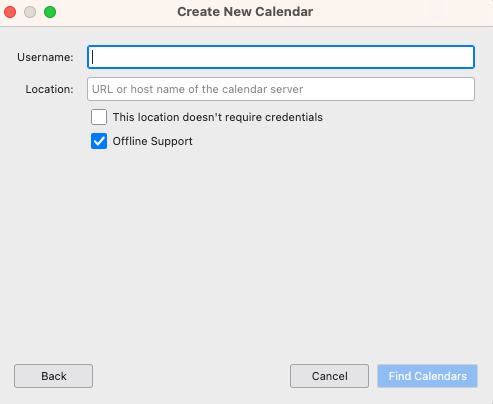
- •Username - your Nextcloud username
- •Location - your Nextcloud CalDAV URL
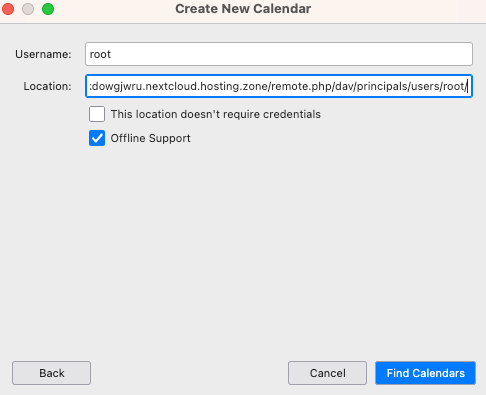
In the Location field, enter your Nextcloud server address using this format:
https://your-nextcloud-domain/remote.php/dav/principals/users/USERNAME/Here, you can replace "your-nextcloud-domain" with your nextcloud domain and "USERNAME" with your actual Nextcloud username.
If you want your calendar to be available offline, you can keep "Offline Support" enabled. And then click "Find Calendars" to continue.
An authentication popup will appear:
You can enter your Nextcloud password (or app password, if applicable) here and enable remember this password if you want Thunderbird to store it.
Click "OK".
Thunderbird will now connect to your Nextcloud account and discover available calendars.
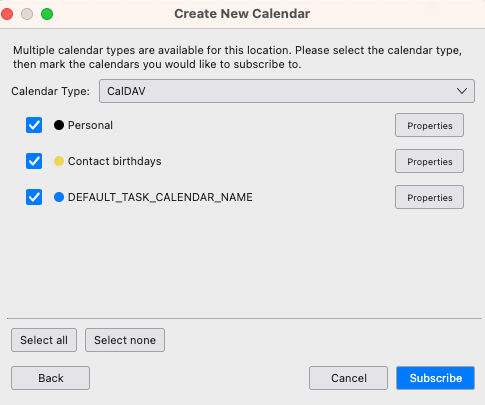
Next, Thunderbird displays all calendars available under CalDAV. The calendars are usually selected automatically. Here, you are free to enable or disable individual calendars based on your needs.
Click "Subscribe" to confirm.
After subscribing, the selected calendars appear in the left panel of the Calendar view.
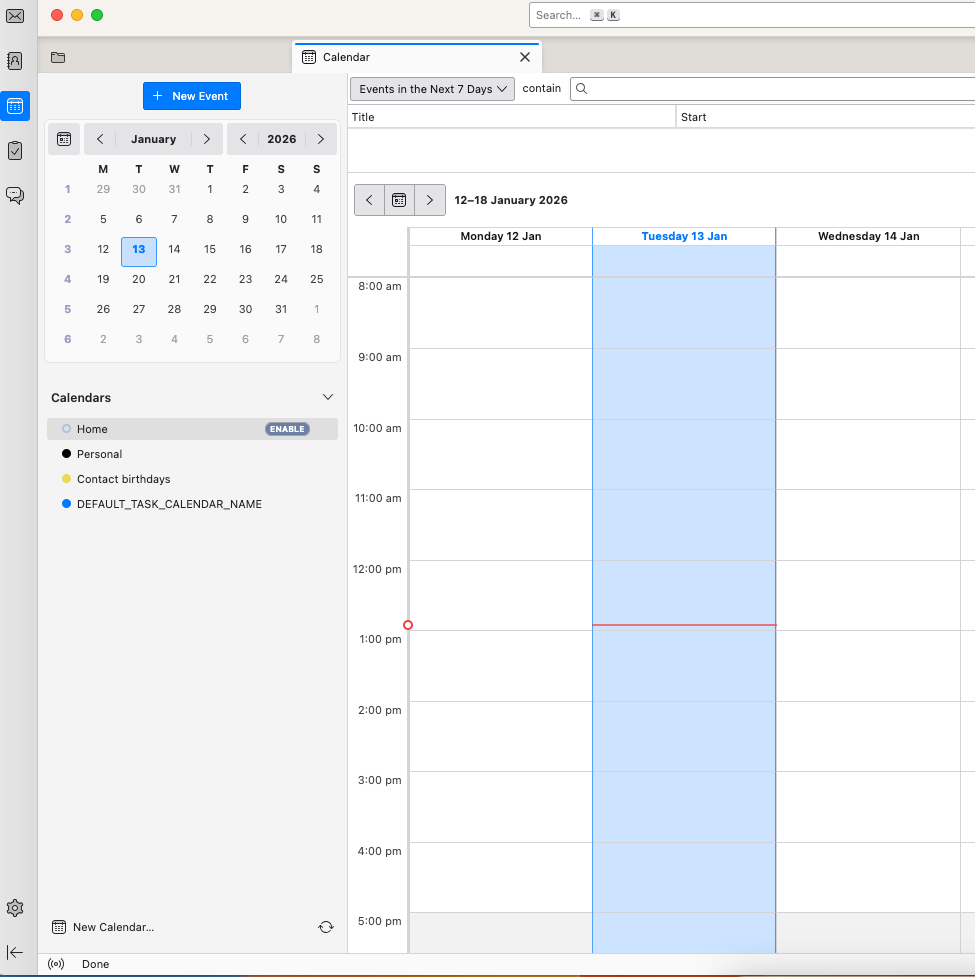
At this point, the sync is complete.
Events added or updated in Nextcloud will automatically appear in Thunderbird, and changes made in Thunderbird will sync back to Nextcloud in the background.
If you also need direct access to your Nextcloud files, you can use WebDAV to connect Nextcloud to your system. See our guide on access Nextcloud files via WebDAV.
When Nextcloud sync is not working in Thunderbird
If contacts or calendars don’t sync as expected, check the following:
- •Confirm you are using the correct CardDAV or CalDAV URL
- •Use an app password if your Nextcloud account has two-factor authentication
- •Make sure your Nextcloud server is reachable over HTTPS
- •Remove and re-add the address book or calendar if sync stalls
If you prefer not to manage server configuration or sync reliability yourself, you can also look at our managed Nextcloud plans, which include maintenance, updates, and protocol-level support.
Does Thunderbird need a plugin to sync with Nextcloud?
You do not need a plugin to sync Thunderbird with Nextcloud in most cases. The recent versions of Thunderbird already support the two protocols that Nextcloud uses for synchronization.
Thunderbird can connect to Nextcloud through CardDAV for contacts and CalDAV for calendars. Because this support is built into Thunderbird, you can connect your Nextcloud account directly without installing any additional extensions.
In practice, the setup works like this:
- •CardDAV handles contact synchronization
- •CalDAV handles calendar synchronization
Once both connections are configured, Thunderbird communicates directly with your Nextcloud server and keeps the data in sync.
Can Thunderbird sync Nextcloud calendars and contacts automatically?
Yes. After the initial setup is complete, Thunderbird keeps your calendars and contacts synchronized automatically.
When Thunderbird connects to Nextcloud through CalDAV and CardDAV, it regularly checks the server for updates. Any changes made in one place appear in the other.
For example,
- •Contacts added or edited in Nextcloud will appear in Thunderbird
- •Calendar events created in Thunderbird will appear in Nextcloud
- •Updates made on either side stay consistent across both platforms
As long as your Nextcloud server is reachable and your login credentials remain valid, Thunderbird continues syncing your calendars and contacts in the background.
Sichere und datenschutzorientierte Nextcloud-Verwaltung mit Hosting in Deutschland.
Cloud-Einblicke: Trends, Tipps & Technologien
Obsidian mit Nextcloud auf all deinen Geräten synchronisieren
Obsidian speichert Notizen als lokale Markdown-Dateien und gibt dir dadurch die volle Kontrolle über deine Daten. Um auf diese Notizen von verschiedenen Geräten aus zugreifen zu können, brauchst du eine Möglichkeit, diese Dateien synchronisiert zu halten. Nextcloud ist eine beliebte Self-Hosted-Lösung, um einen Obsidian Vault über Desktop-PCs, Laptops, Smartphones und Tablets hinweg zu synchronisieren. Da beide Tools mit normalen Dateien arbeiten, ist keine spezielle Integration erforderlich. V

Die besten Seafile Alternativen im Jahr 2026
Organisationen verlassen sich zunehmend auf Plattformen für Dateisynchronisierung und Dateifreigabe, um die Zusammenarbeit zu unterstützen, wachsende Datenmengen zu verwalten und die Kontrolle darüber zu behalten, wo Informationen gespeichert werden. Obwohl Seafile dank seiner effizienten Synchronisierungsfunktionen und Self-Hosted-Bereitstellungsoptionen weiterhin eine beliebte Wahl ist, ist es möglicherweise nicht für jeden Anwendungsfall die richtige Lösung. Einige Organisationen benötigen u
Bestes Secure File Sharing für Buchhalter im Jahr 2026
Wirtschaftsprüfungs- und Steuerberatungskanzleien tauschen einige der sensibelsten Geschäftsdokumente überhaupt aus. Steuererklärungen, Gehaltsabrechnungen, Finanzberichte, Bankdaten und Audit-Dateien werden täglich zwischen Mitarbeitern, Mandanten und externen Partnern ausgetauscht. Die Herausforderung besteht nicht einfach darin, Dateien von einer Person zur anderen zu übertragen. Kanzleien benötigen eine sichere Möglichkeit, sensible Dokumente auszutauschen, während sie gleichzeitig Complianc

Kontaktieren Sie uns direkt unter
PEWEO SARL
5, Montée des Aulnes
L-6611 Wasserbillig
LU33030425