Best OneDrive Alternatives for Businesses in 2026
8 min read · 29.09.2026
Our Blog / nextcloud-encryption-with-cryptomator
← Back to overview
Most people assume their files are safe once they are stored in a private cloud. To a degree, that's true, especially when the hosting infrastructure is locked down, encrypted in transit, and managed under strict data protection laws.
But there's a gap between "safe on the server" and "unreadable by anyone except me." That gap is where Cryptomator fits in.
It encrypts your files locally, before they ever reach the server, so nobody can read them without your password. This guide walks you through how Nextcloud encryption with Cryptomator works and how to set it up on Windows and macOS.
Cryptomator is a free, open-source encryption tool built specifically for cloud storage. It has become one of the most trusted tools for client-side encryption across cloud platforms, including Nextcloud.
Files are encrypted locally on the user’s device before they ever reach the cloud. Both file contents and file names are protected using strong AES-based encryption. If someone were to look directly at your cloud storage, they would see nothing but unreadable, encrypted files with no way to identify what's inside.
Before setting up Cryptomator, you need a working Nextcloud sync connection on your device. Cryptomator operates on locally synchronized folders, so the Nextcloud desktop client must already be configured.
You will need:
If you are a CloudBased Backup customer, you will have received your Nextcloud server credentials during onboarding. Just plug those into the desktop client and you are ready to go.
Download Cryptomator for macOS and install it by dragging the app into your Applications folder. You will get a license agreement on first launch. Accept it and move on.
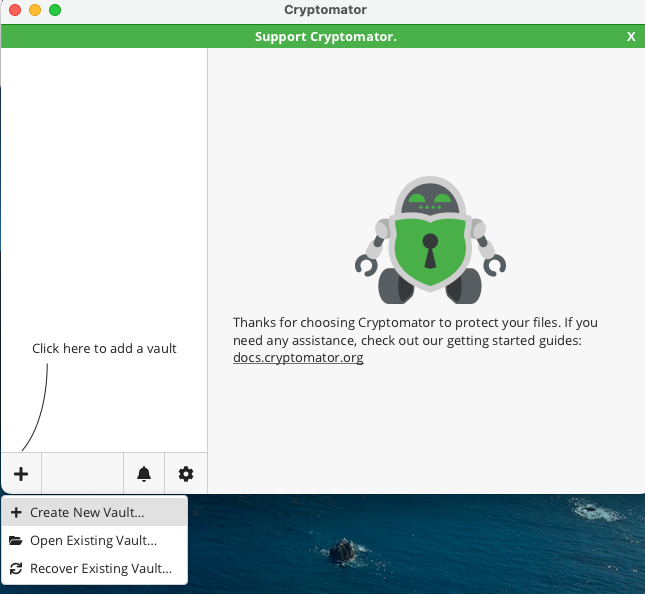
Next, you will see an interface with a "+" icon in the bottom-left corner. Click that and hit "Create New Vault."
Cryptomator now asks you to name the vault. For example, we went with "Nextcloud-Vault". This name becomes the actual folder name inside your Nextcloud directory, so keep it simple. Click "Next."
Now here's the step that matters most. Cryptomator asks where it should save the encrypted files, and you need to point it to your Nextcloud sync folder.
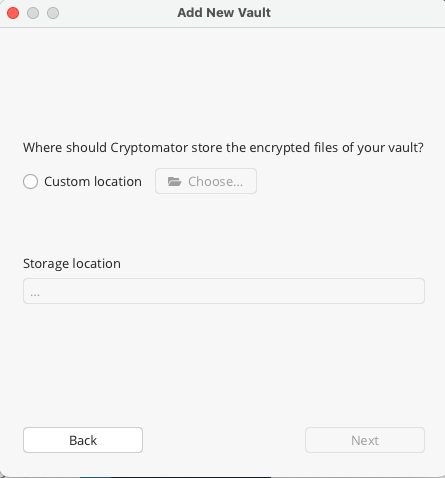
Select "Custom location," click "Choose," and navigate to your local Nextcloud sync folder. Make sure you select the Nextcloud folder itself, not a subfolder inside it.
If you skip this or pick the wrong location, your encrypted files won't sync to Nextcloud. So double-check before you confirm and then click "Next".
After that, Cryptomator shows you a quick summary of what you've configured: vault name and where it's being stored.
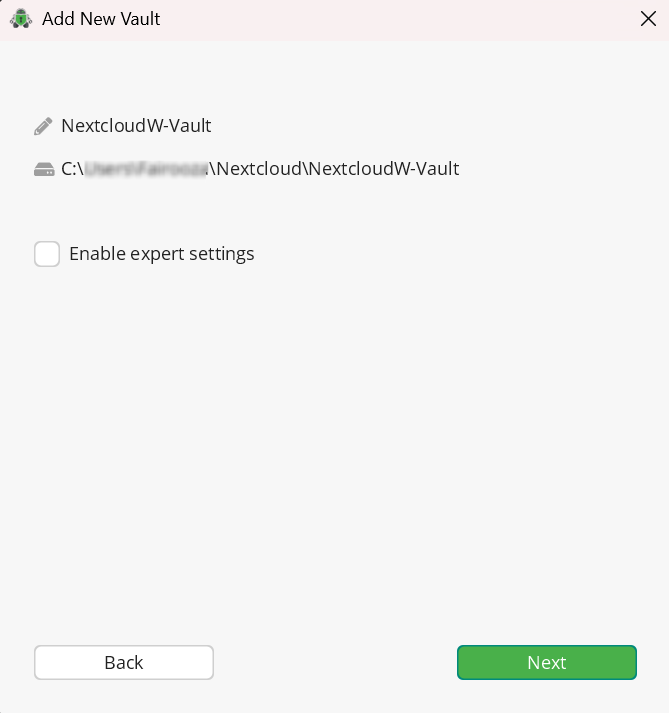
You will also notice an "Enable expert settings" checkbox. Leave that unchecked. The defaults are solid and work well for most setups. Click "Next".
Next up is the vault password. Pick a strong one. Don't reuse your Nextcloud login password here. This password is the only thing standing between your files and everyone else.
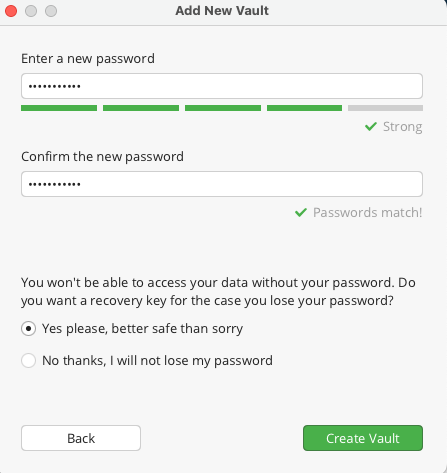
Cryptomator then asks if you want a recovery key. Choose the option "Yes please, better safe than sorry", and then click "Create Vault".
You'll get a recovery key on screen.
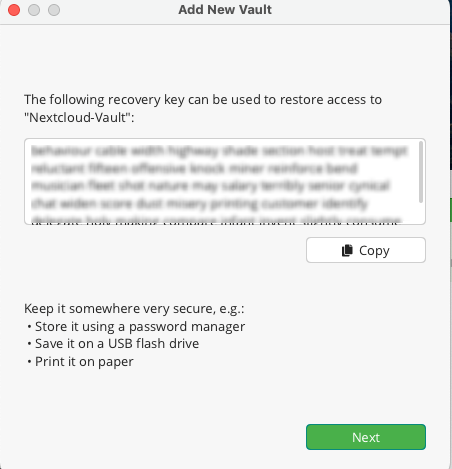
This is your lifeline if you ever forget the vault password. Copy it and store it somewhere safe, like your password manager's secure notes. Just don't store it inside Nextcloud itself.
Once you’ve saved the recovery key, click “Next” to continue.
With everything set up, click "Unlock Now" and type in your password. After the vault unlocks successfully, click “Reveal Drive” when prompted. macOS might ask for a couple of permission approvals at this point. Grant them. Cryptomator will mount the vault as a virtual drive on your system.
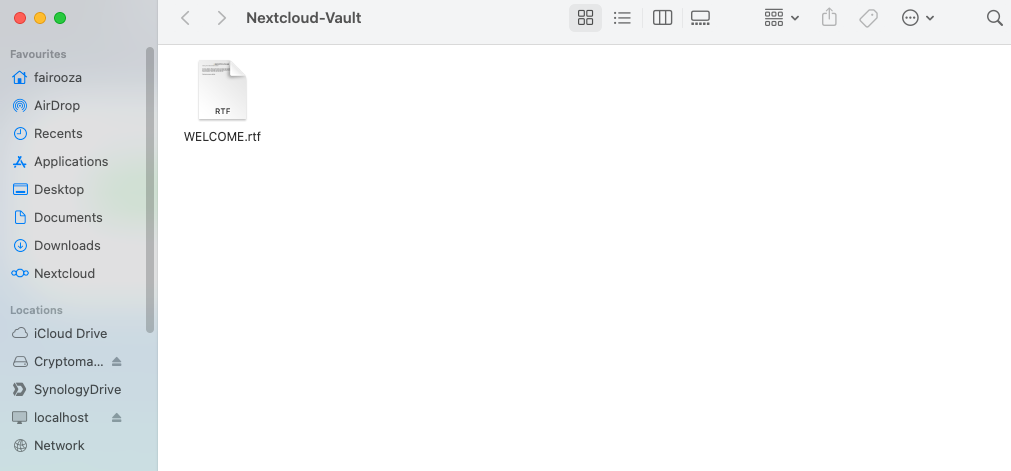
Your vault now shows up in Finder as a mounted drive, just like a USB stick. Whatever you drop in there gets encrypted automatically before it syncs to Nextcloud.
In the Nextcloud web interface, the files inside the vault are only available in encrypted form. This ensures that neither the hosting provider nor the server itself can read the contents of your data.
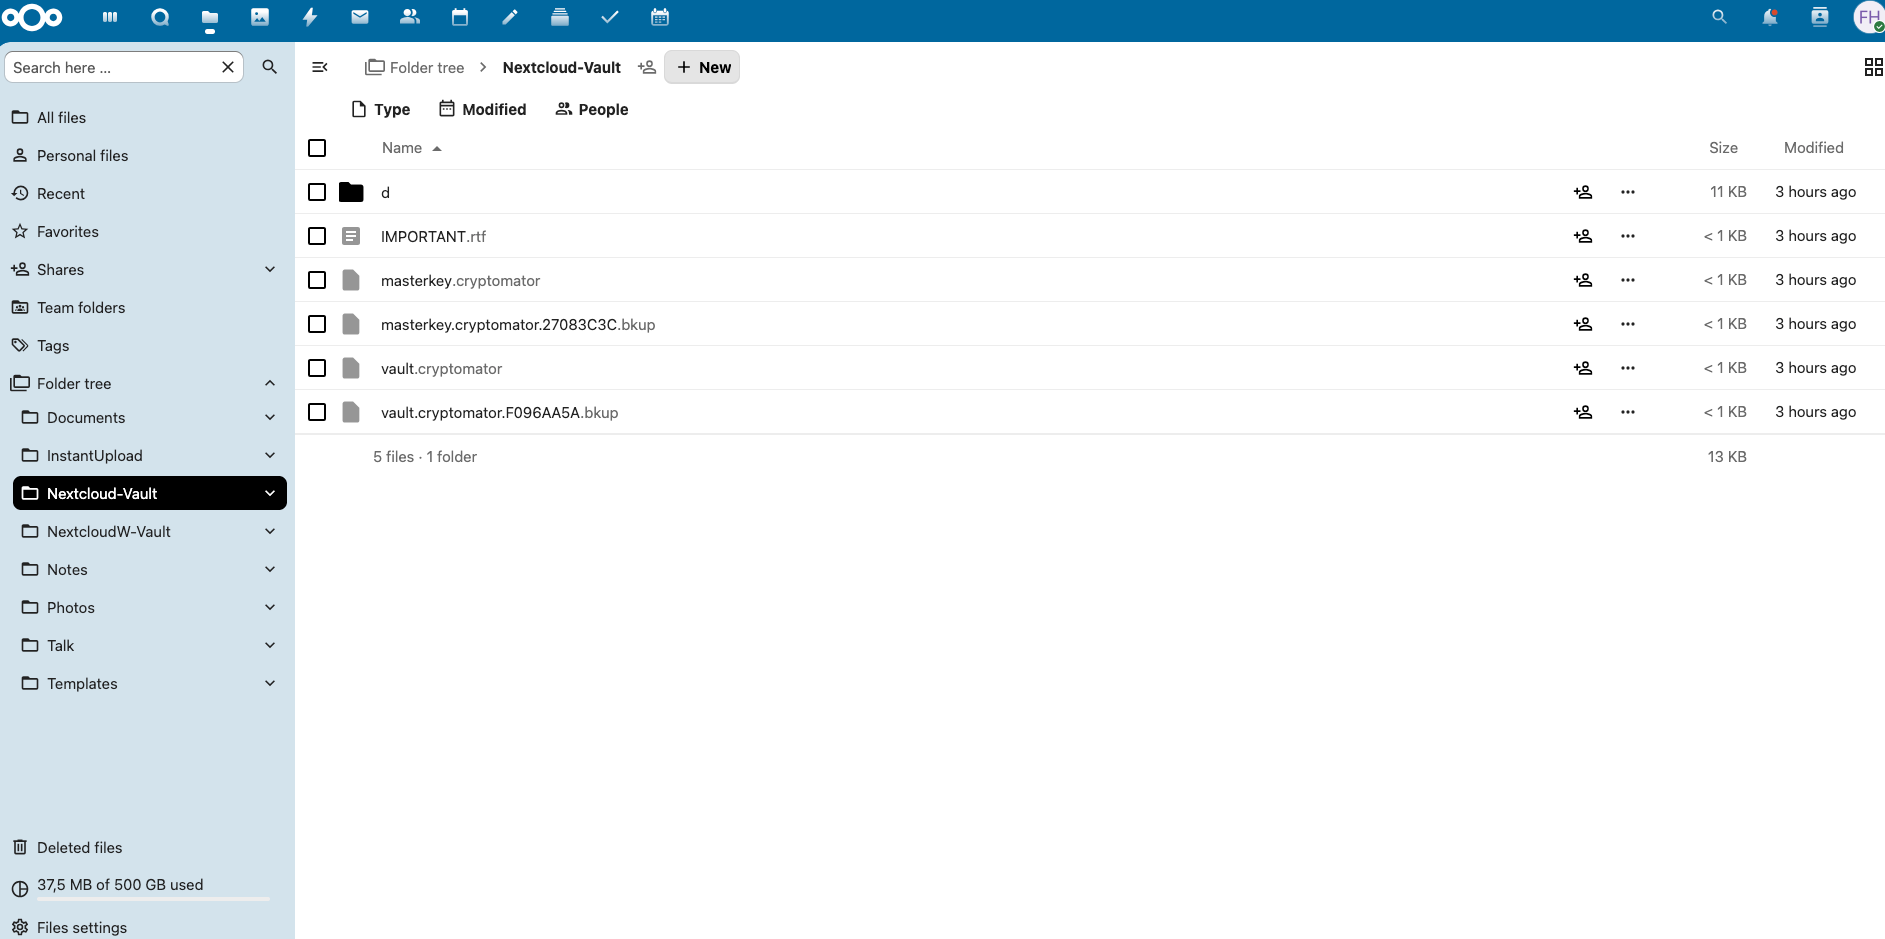
The trade-off is that decrypted files are not accessible through the Nextcloud web interface. To work with your documents, the vault must be unlocked locally using Cryptomator.
The overall setup process on Windows is the same as on macOS. You install Cryptomator, create a vault inside your local Nextcloud sync folder, set a password and recovery key, and unlock the vault to start working with your files.
The main difference on Windows is how the unlocked vault appears in the file system. After unlocking the vault, Cryptomator mounts it as a drive letter (for example, D: or E:) in File Explorer.
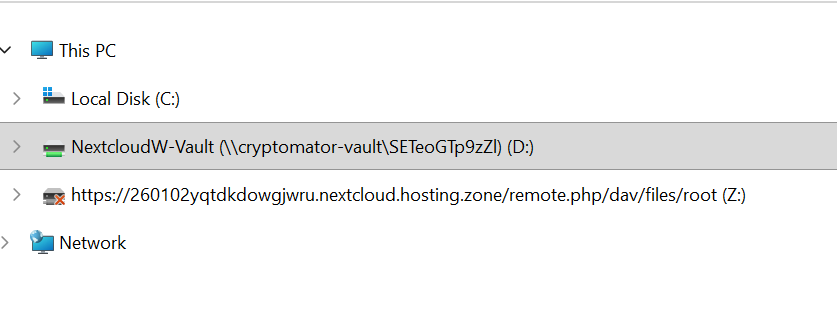
This drive represents the decrypted view of your vault. Any files placed here are encrypted locally before being synced to Nextcloud.
The encrypted vault folder inside your Nextcloud directory, as well as the encrypted view shown in the Nextcloud web interface, behave the same way as on macOS.
As covered in the setup steps above, Cryptomator lets you generate a recovery key when creating a vault. Many users skip this. Don't.
If both your vault password and recovery key are lost, the encrypted data is permanently unrecoverable. No hosting provider and no support team can help.
For business use, this is especially important. If a team member leaves and their vault password isn't documented, a recovery key may be the only way to access those files. Build recovery key storage into your onboarding and offboarding processes.
8 min read · 29.09.2026
9 min read · 22.09.2026
5 min read · 14.09.2026
Hosted in
Germany
4.3on G2