Nextcloud gives you full control over your files in the cloud. But syncing all data to your local device is not always practical, especially when working with large files or with a limited disk space.
Using WebDAV, you can connect your Nextcloud as a network drive and access your files directly from your operating system without permanently storing them on your local machine.
Here, you will learn how to access your Nextcloud via WebDAV on Windows and macOS.
What Is WebDAV in Nextcloud?
WebDAV, which stands for Web Distributed Authoring and Versioning, is a standard protocol that allows files stored on a remote server to be accessed as if they were part of a local network drive.
In Nextcloud, WebDAV enables you to browse, open, and manage files directly from your file manager without using the web interface. And the files remain stored in the cloud and are accessed on demand over an internet connection.
WebDAV is useful in situations where you don’t want to sync all files locally, or work with large files sometimes and have limited storage with a stable internet connection.
It's important to note that files accessed via WebDAV are not available offline, and interruptions in connectivity may affect the file operations. And for the unreliable connections, the Nextcloud desktop client is usually a better option.
To use WebDAV with Nextcloud, you require an active Nextcloud account, a steady and stable internet connection, and a computer running Windows, macOS, or Linux. Additionally, your Nextcloud instance should be HTTPS-enabled to ensure secure communication.
In most managed Nextcloud setups, WebDAV and SSL encryption are already enabled by default.
How to Find Your Nextcloud WebDAV URL
To connect to Nextcloud using WebDAV, you first need the WebDAV URL for your account. In most cases, it follows this format:
https://your-domain.example/remote.php/dav/files/rootHere, you can replace your-domain.example with the actual domain where your Nextcloud is hosted.

You can also find the WebDAV URL directly in the Nextcloud web interface. To do this, open "Files settings", and the WebDAV address will be shown there.
Make sure the URL starts with https:// to ensure your connection is secure and encrypted.
Set Up WebDAV on Apple macOS
On macOS, you can use Nextcloud without installing the Nextcloud desktop app by connecting it via WebDAV directly in Finder. No additional software is required.
This method allows you to access your Nextcloud files as a network drive. Files are accessed online and are not stored permanently on your Mac.
First, you need to make sure the Finder is open. Click on "Go" and open "Connect to Server...".
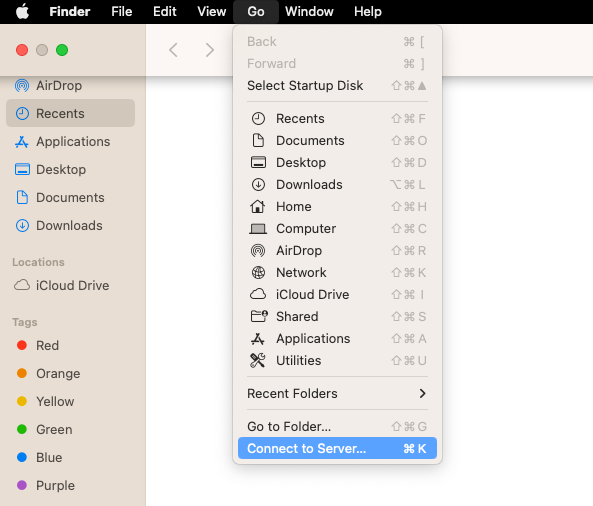
Now, a new window will open titled “Connect to Server”.
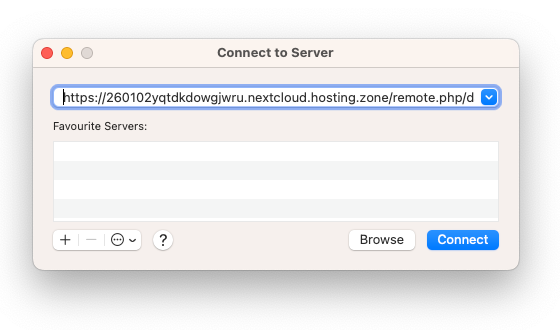
In the Server Address field, enter your Nextcloud WebDAV URL and then click "Connect".
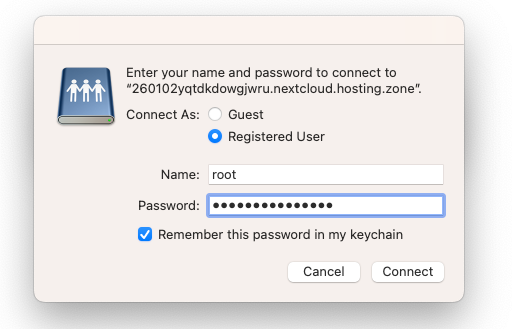
Now, you will be asked to authenticate. Select the "Registered User" and enter your Nextcloud username and password.
To avoid logging in again later, enable the option “Remember this password in my keychain” and click "Connect".
Once the connection is successful, your Nextcloud will appear as a new network drive.
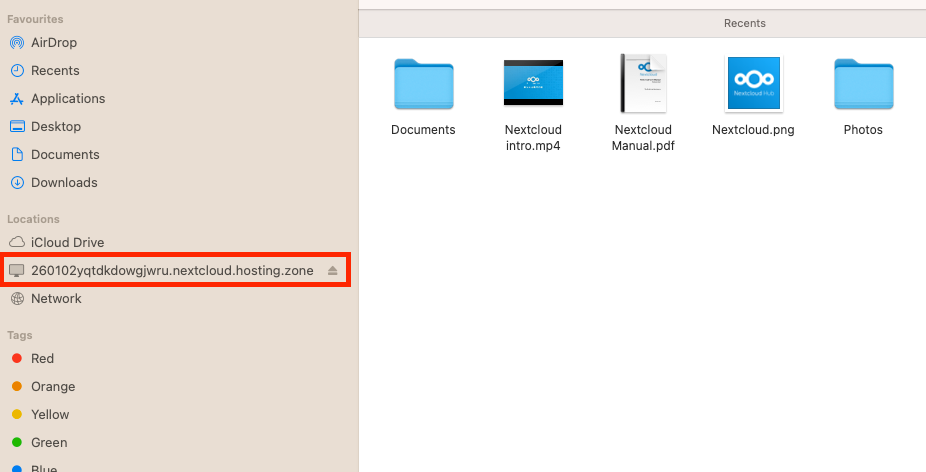
It will be visible in Finder’s sidebar. You can browse folders, open files, and work with them like any other drive. Files remain stored in Nextcloud and are accessed over the internet.
Set Up WebDAV on Windows
To use WebDAV on Windows, the WebClient service must be running. This service enables WebDAV connections but is not always active by default. To manage this service, you need administrator rights on your computer.
Start by opening Computer Management. In Windows, you can find it by typing "Computer Management" into the search bar.
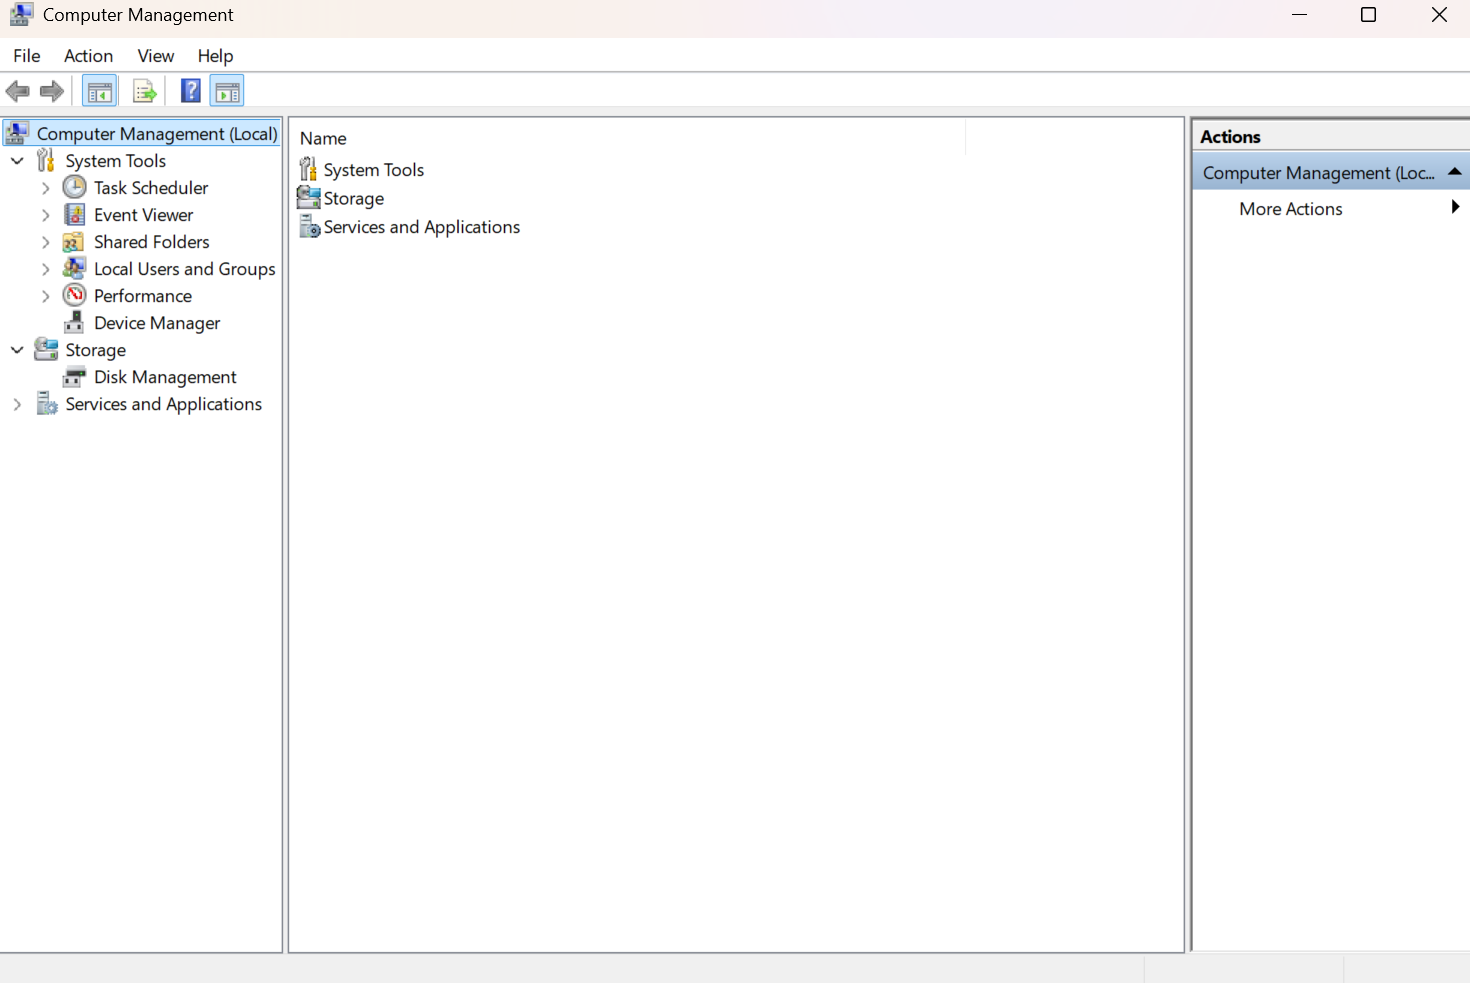
Inside Computer Management, open "Services and Applications" and click on "Services".
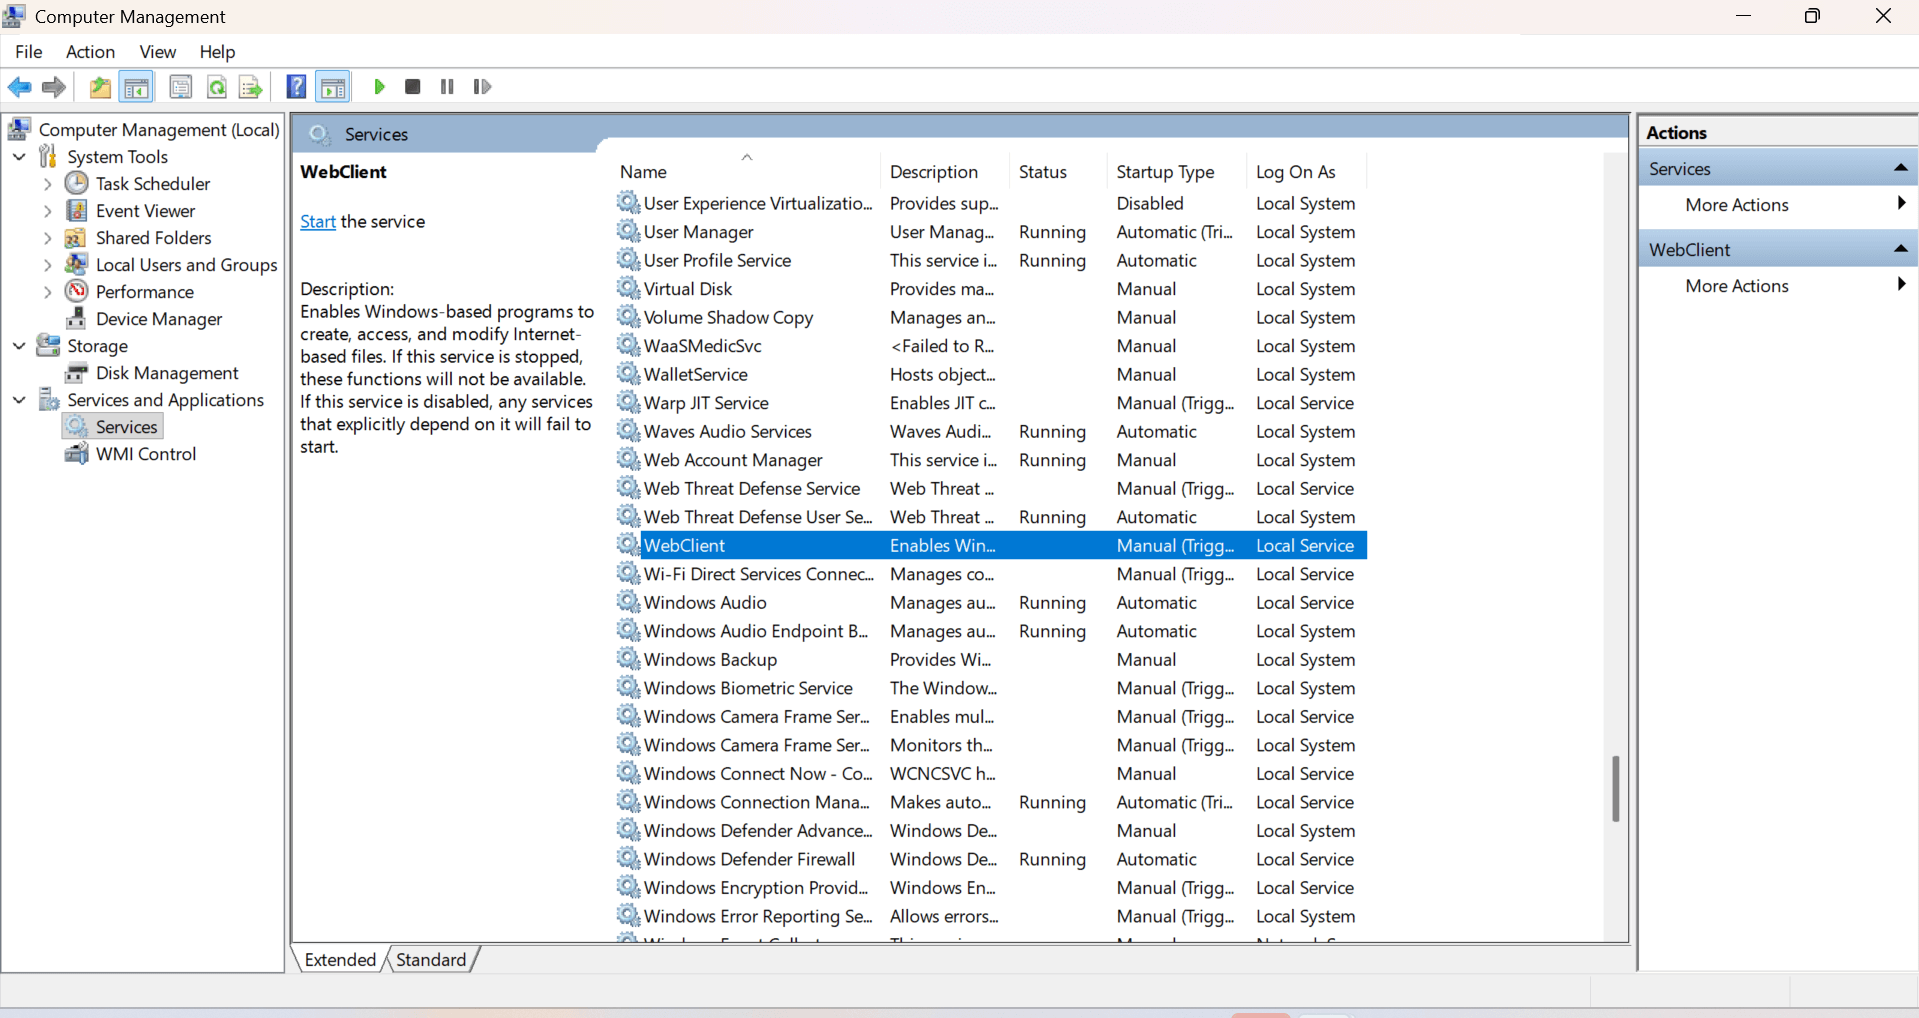
Now, scroll through the list and locate "WebClient". Right-click on it and select "Properties".
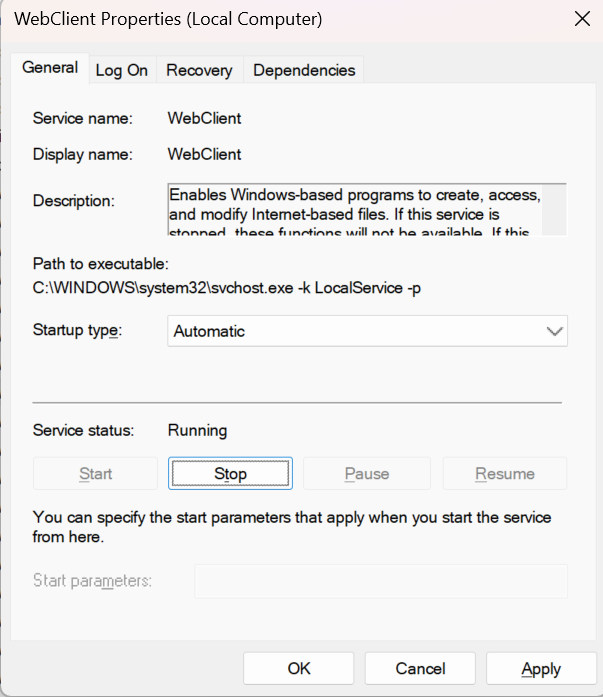
In the properties window, set "Startup type" to "Automatic" and click "Start" to activate the service. Now click the "OK" to confirm.
Once this is done, WebDAV support is enabled on your system.
Mount Nextcloud as a WebDAV Network Drive via File Explorer
After enabling the WebClient service, you can connect your Nextcloud using File Explorer.
Open File Explorer by pressing Windows + E on your keyboard.
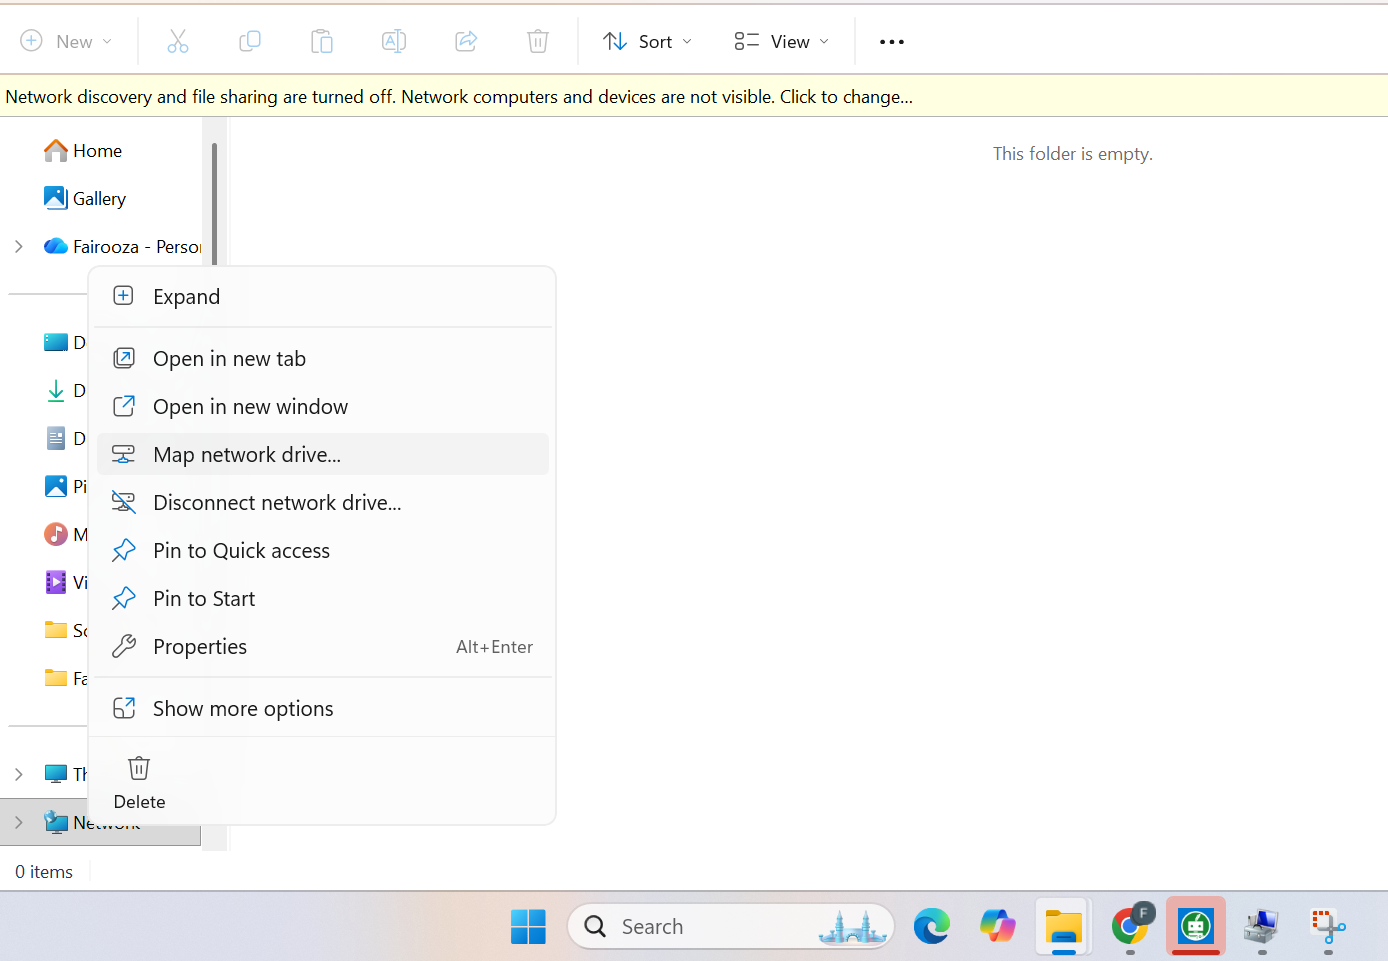
In the left sidebar, right-click on Network and select “Map network drive…”.
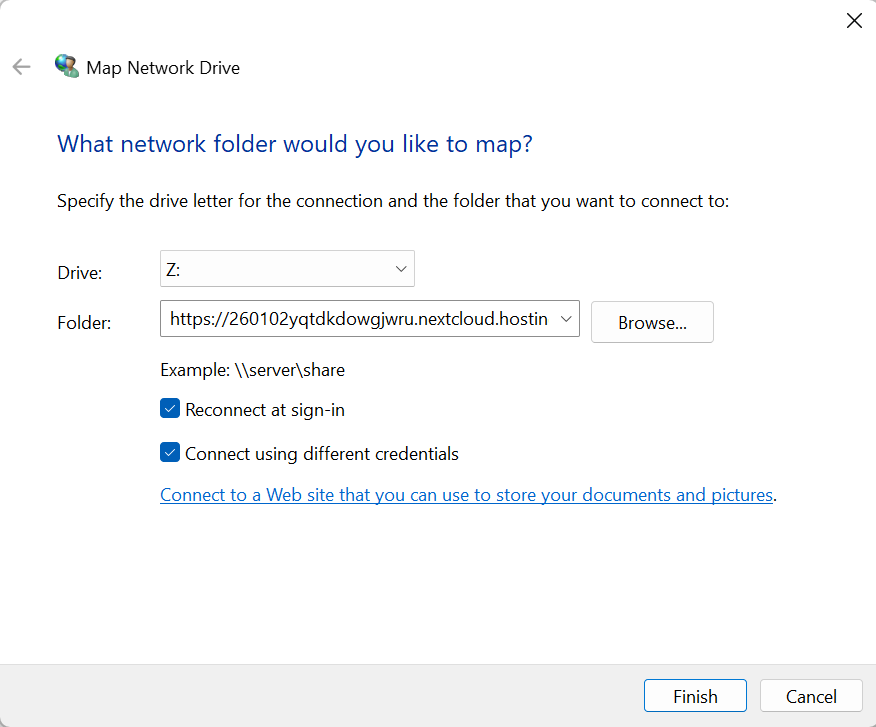
A new window will open where you can choose a free drive letter (for example, Z:). Then enter your Nextcloud WebDAV URL in the "Folder" field.
And it’s best to turn on "Reconnect at sign-in" so Windows automatically reconnects the drive when you restart your computer. Additionally, enable "Connect using different credentials". Once done, then click "Finish".
Windows will now ask for your Nextcloud username and password. Please provide that and click "OK".
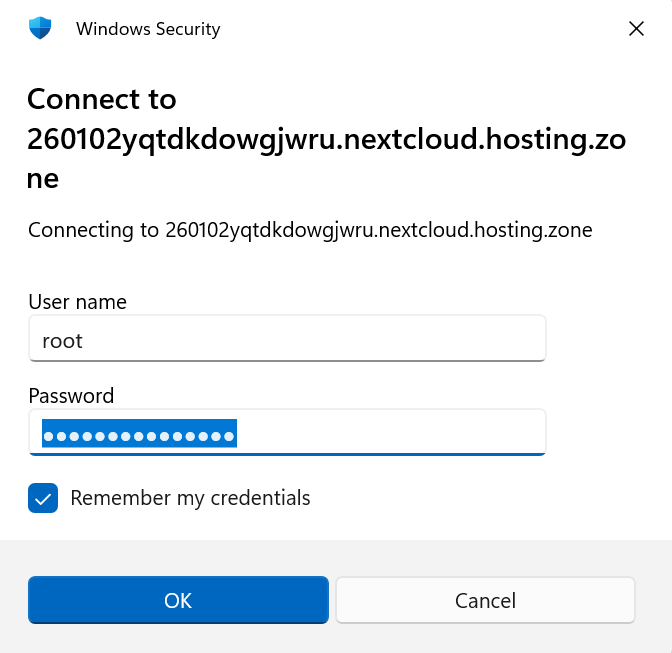
After the successful login, your Nextcloud will appear in File Explorer as a network drive and can be used like an external hard drive.
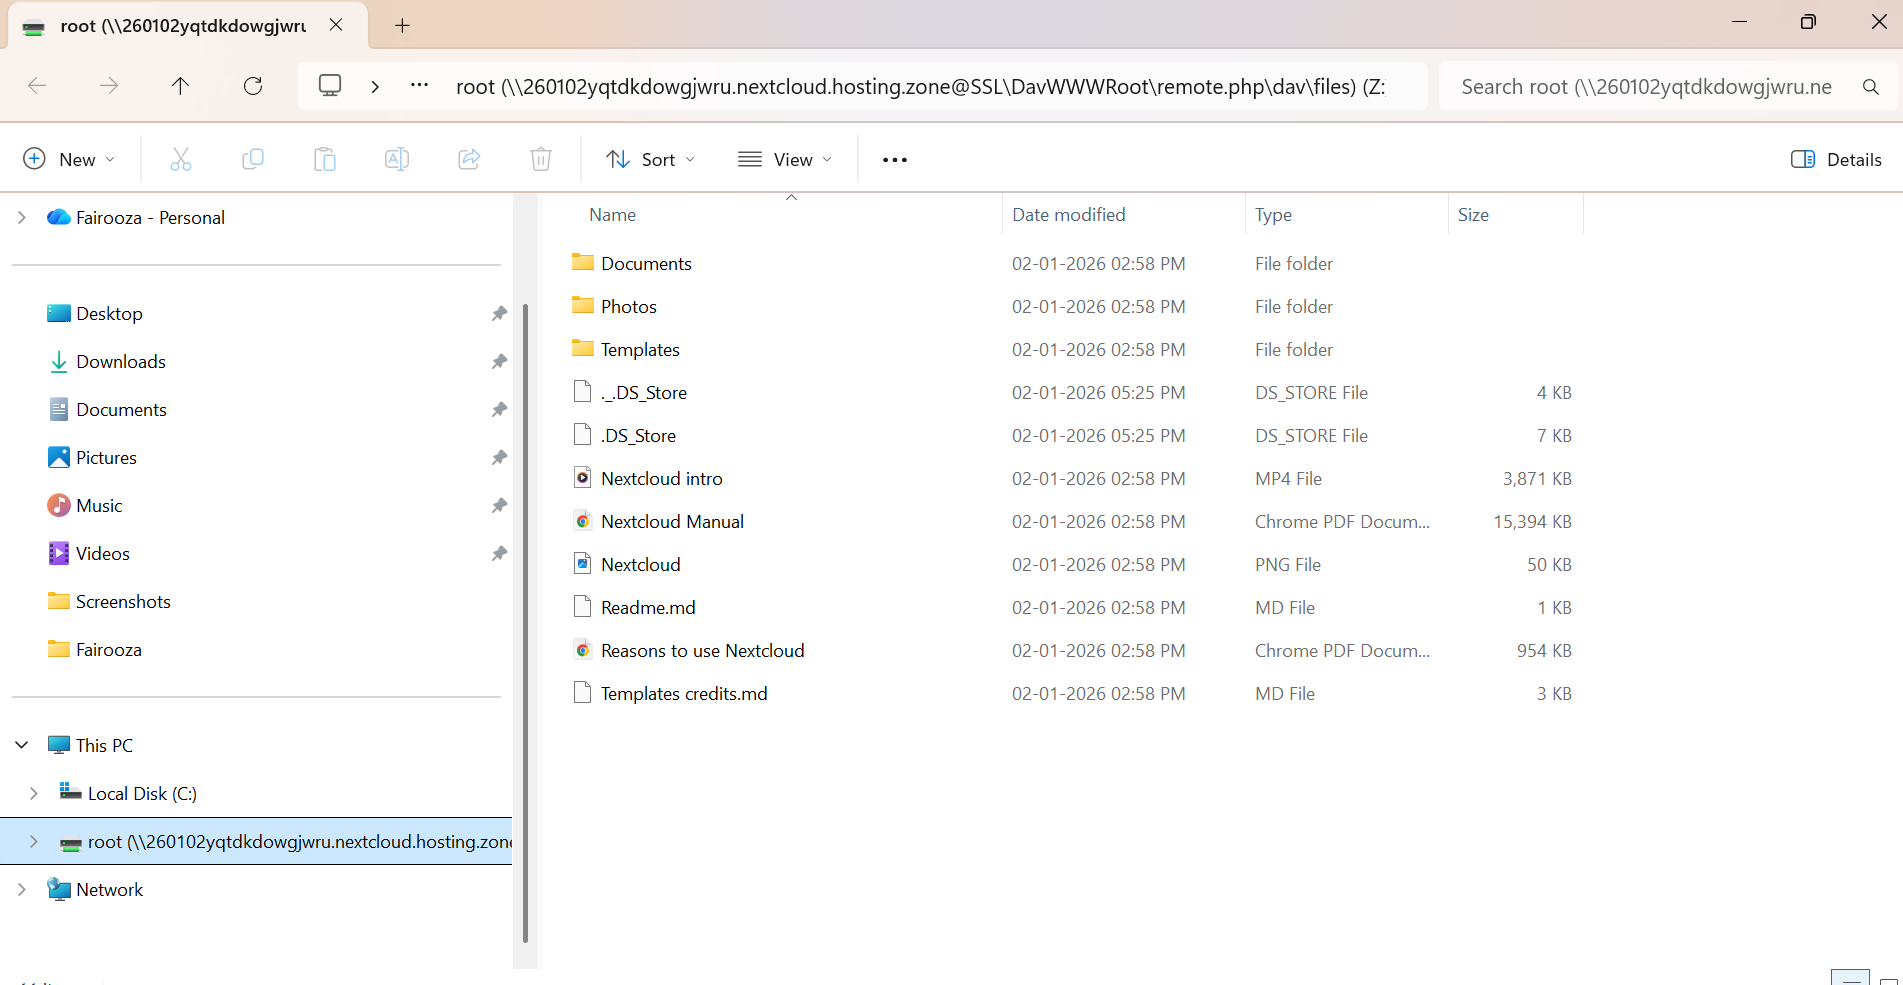
And that’s it, your Nextcloud is now connected and ready to use.
Connect Nextcloud via WebDAV Using the Windows Command Line
Users can also connect to their Nextcloud via WebDAV using the Windows command prompt. And this method is an alternative to mapping the network drive through File Explorer.
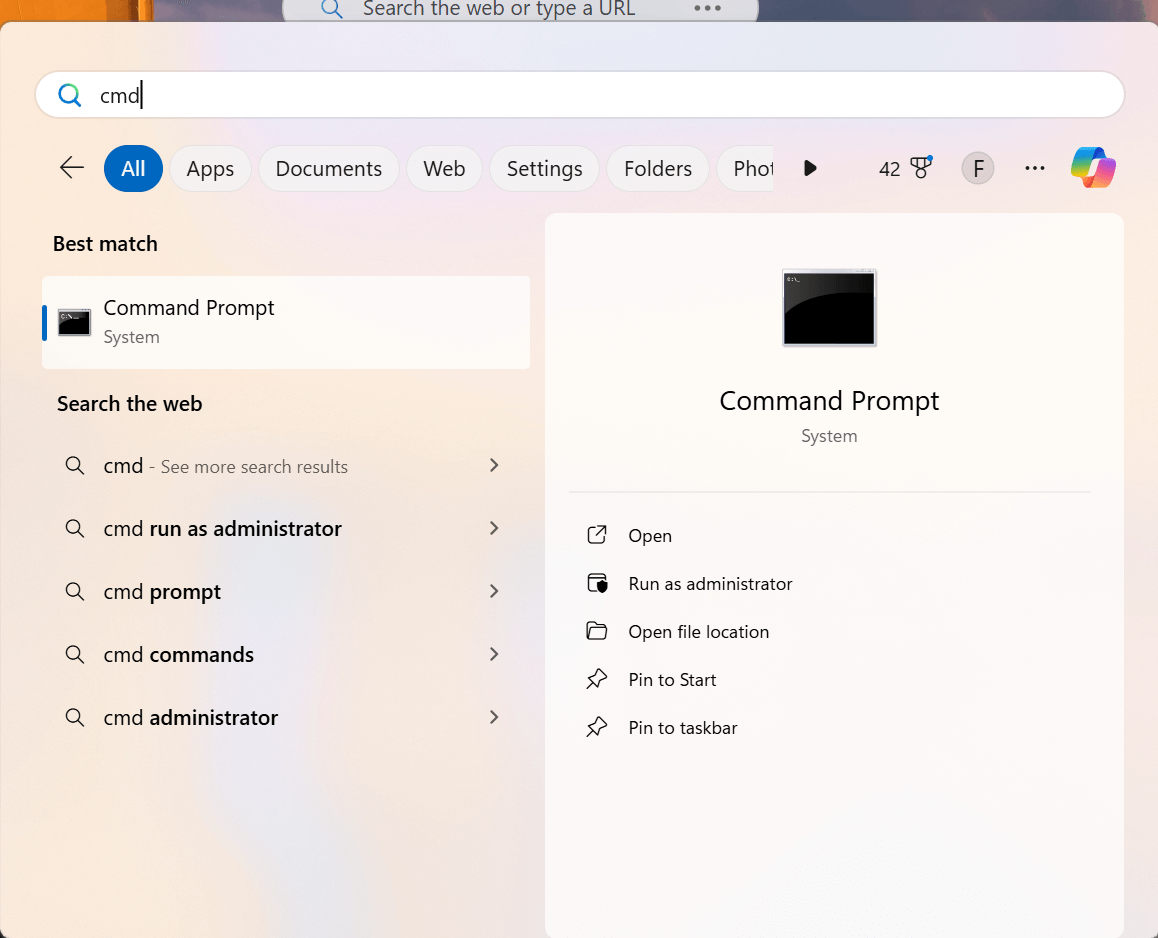
For that, open "Command Prompt" from the Start menu under Windows System.
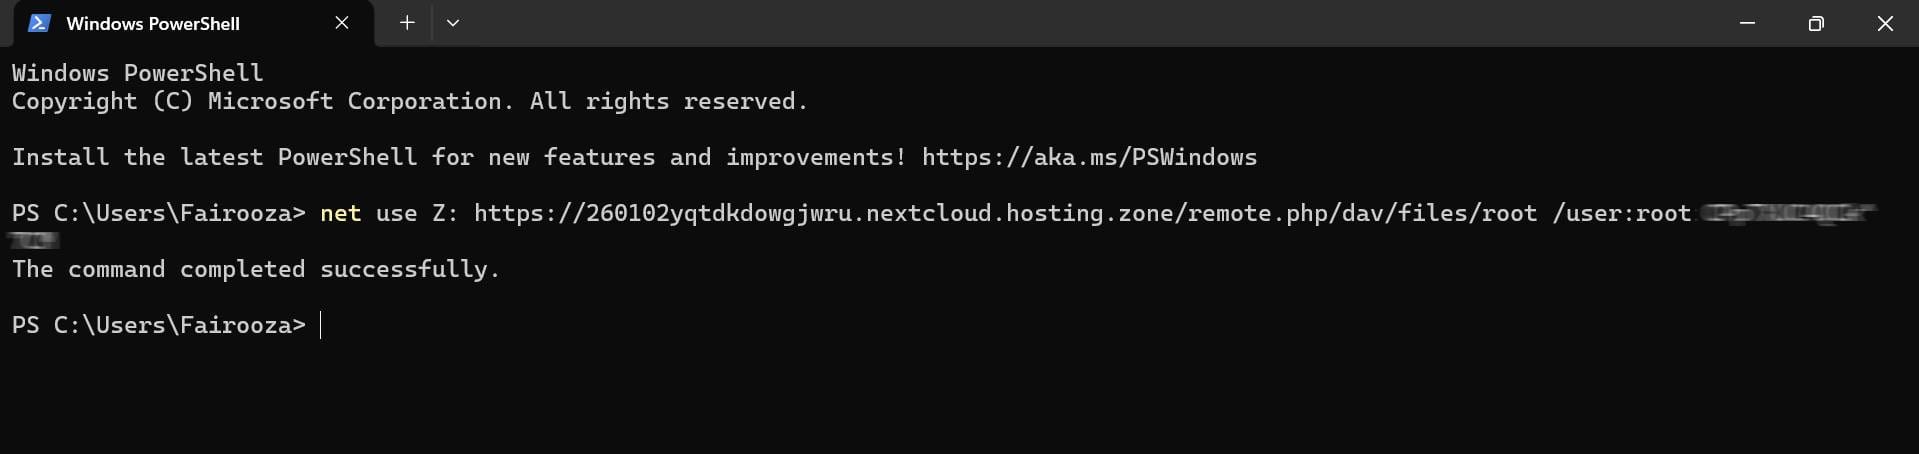
Use the following command. You can replace the placeholders with your own details:
net use Z: https://your-domain.example/remote.php/dav/ /user:username passwordIf the command is successful, Windows will confirm the connection like this:
And the drive will then appear in File Explorer under the selected drive letter.
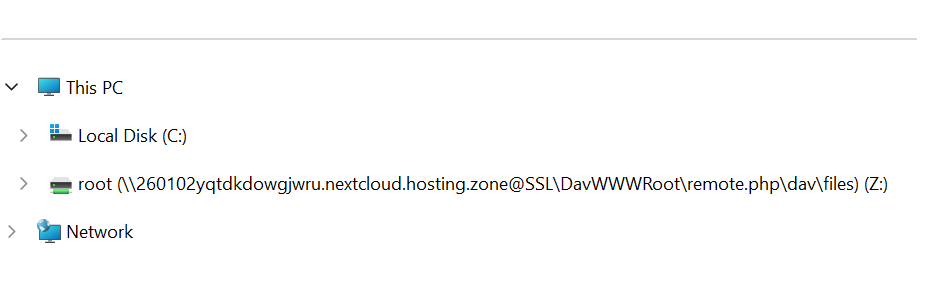
So that's it, your Nextcloud is now connected as a network drive.
If you are looking for a fully managed Nextcloud solution with professional hosting and maintenance, you can take a look at our Nextcloud hosting plans.
Secure and privacy-first managed Nextcloud hosted in Germany.
Cloud Insights: Trends, Tips & Technologies
How To Use Nextcloud Groupware
Managing communication, schedules, and tasks across multiple separate tools can quickly become fragmented, especially in team environments. Information ends up scattered across email clients, chat apps, calendars, and project tools, making coordination less efficient and harder to track. Nextcloud Groupware addresses this by bringing these core productivity functions into a single self-hosted platform within Nextcloud. This guide explains how to use this suite of applications in practice, cove
Nextcloud SSO Explained: How Single Sign-On Works for Organizations
Most teams don’t start with SSO. They start with a simple setup, like users log in, share files, collaborate, and move on. Then things grow. More users join. More tools get added. Someone leaves the company and still has access to systems they shouldn’t. Password resets become routine. At that point, questions around Nextcloud SSO usually begin to surface. Not because it’s trendy, but because managing access starts to feel messy. This guide breaks down how Nextcloud Single Sign-On works, whe

How To Use Nextcloud Office
Browser-based collaboration tools have become essential for teams and businesses that need to work efficiently across locations. Nextcloud Office provides a secure platform for creating and editing documents, spreadsheets, and presentations without relying on traditional desktop software. Nextcloud Office is typically powered by Collabora Online (or Collabora CODE for smaller deployments), ensuring compatibility with standard Office formats. This guide will walk you through using Nextcloud Offi

Reach out directly at
PEWEO SARL
5, Montée des Aulnes
L-6611 Wasserbillig
LU33030425