How to Connect AI Tools to Nextcloud with MCP
6 min read · 12.10.2026
Our Blog / how-to-upgrade-your-cloudbased-backup-plan-from-your-dashboard
← Back to overview
Need more storage for your files or want to move to a plan that better fits your needs? You can upgrade your existing CloudBased Backup Nextcloud hosting plan directly from your dashboard without creating a new account.
Your dashboard is where you manage your existing subscription, so you can start the upgrade process from the account you already use. In this guide, we’ll walk you through each step to help you find the right option and upgrade your current plan without confusion.
You can easily upgrade your current plan right from your CloudBased Backup dashboard, and all your files, users, and apps will stay as they are.
Follow these steps to upgrade your plan.
Visit the CloudBased Backup website and click Dashboard in the top navigation bar. Log in to your account if you haven't already.
Once you log in, you'll see the Your Nextcloud instances page, which lists the Nextcloud instances associated with your account.
Find the instance you want to upgrade and click Manage. This opens the instance details page, where you can view your current plan, subscription status, storage usage, and other settings.
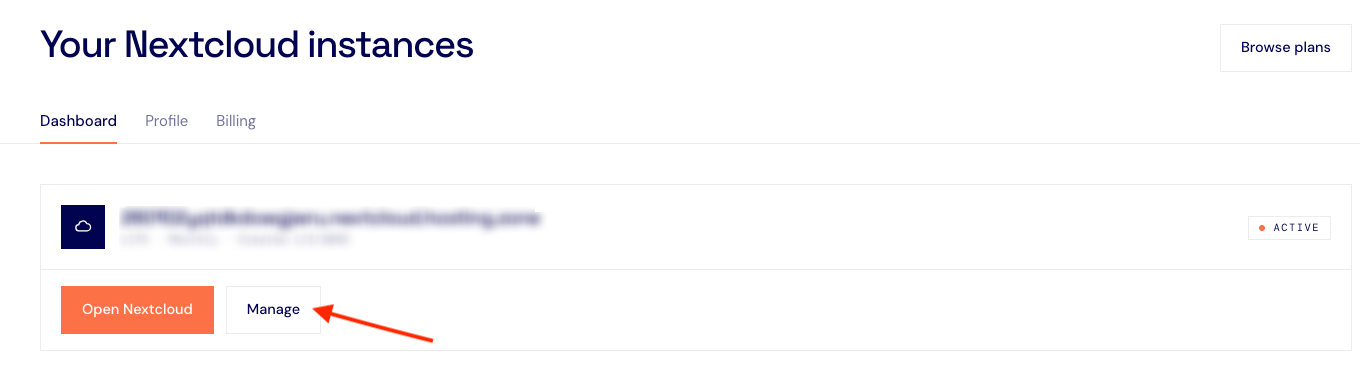
Make sure you've opened the correct instance if your account has more than one.
On the instance details page, find the Upgrade plan section. Click the dropdown menu to see the available upgrade options.
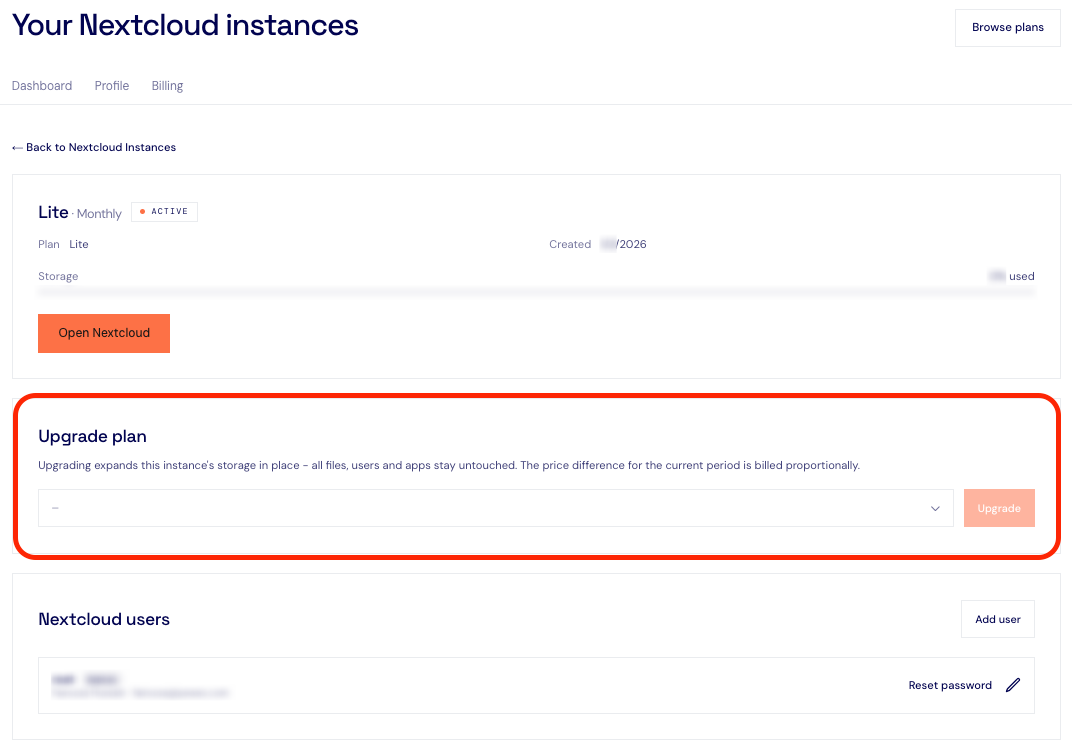
Select the plan you want to switch to. For example, if you're currently using the Lite plan and need more storage, you can select Pro, Team, or Company, depending on your requirements.
After selecting your preferred plan, click Upgrade to proceed.
A confirmation popup will appear with the details of your selected plan. Check the new plan name, the included storage, and the amount you'll be charged before proceeding.
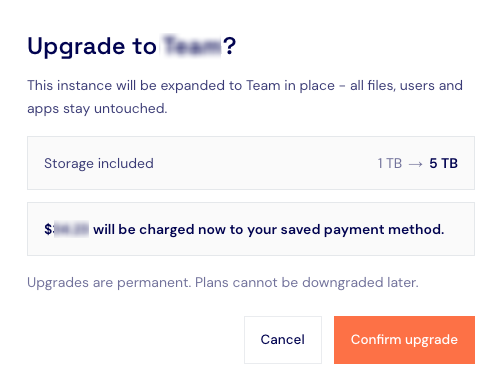
If everything looks correct, click Confirm upgrade to complete the process.
That's it! Your CloudBased Backup plan upgrade is complete. You can now continue using your Nextcloud instance with your upgraded plan.
If you cannot find the upgrade option or the upgrade process isn't working, check that you are managing the correct Nextcloud instance and try again. Make sure you review any error messages displayed on the screen.
Still having trouble? Contact the CloudBased Backup support team with a description of the issue and a screenshot of what you see on your dashboard. This will help the team understand the problem and guide you through the next steps.
6 min read · 12.10.2026
8 min read · 29.09.2026
9 min read · 22.09.2026
Hosted in
Germany
4.3on G2