Best OneDrive Alternatives for Businesses in 2026
8 min read · 29.09.2026
Our Blog / how-to-add-a-user-to-nextcloud
← Back to overview
Managing users is one of the first real admin tasks you will face after setting up Nextcloud. Whether you are onboarding a teammate, giving a client access, or preparing a shared workspace for your business, knowing how to add or create a new user in Nextcloud matters.
And it really does, especially if you are running a managed Nextcloud instance through CloudBased Backup, where user management is built right into your client dashboard.
Let's walk through it together.
Before we get into the how, let's talk about the why for a second.
Every person who accesses your Nextcloud environment needs their own user account. This is not just about the organization, but it's about security, accountability, and control. Individual user accounts let you set granular permissions, track activity, manage storage quotas, and revoke access instantly when someone leaves the team.
If you are managing files, calendars, contacts, or any collaborative workflow through Nextcloud, proper user management is the backbone of your setup.
Adding a new user to your Nextcloud account is pretty easy with CloudBased Backup. You don’t need to dig through complicated settings or send separate invitations. You can create the user directly from your account dashboard in just a few steps.
Start by clicking Log in in the top navigation of the CloudBased Backup website.
You can sign in with your email and password. If you prefer, you can also enter your email address and choose "Email me a sign-in link" to log in without entering your password.
Once you’re logged in, click Dashboard in the top-right corner.
You’ll be taken to Your Nextcloud instances, where you can see your active Nextcloud account.
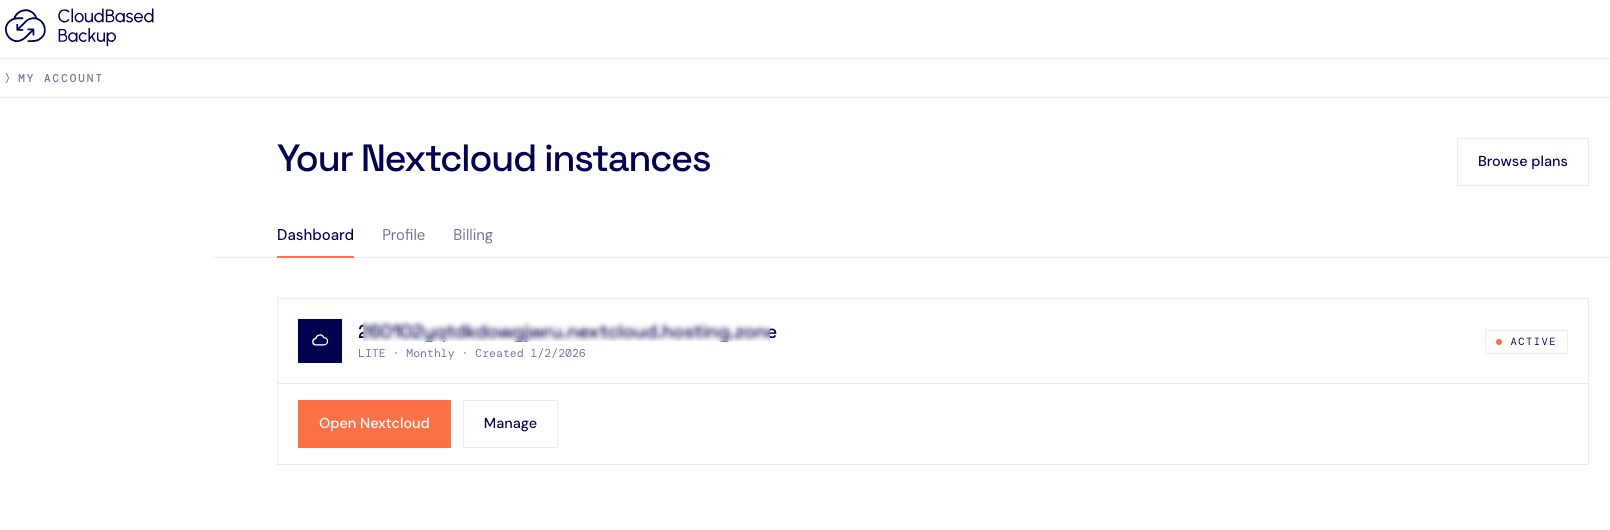
Find the Nextcloud instance where you want to add a user and click Manage.
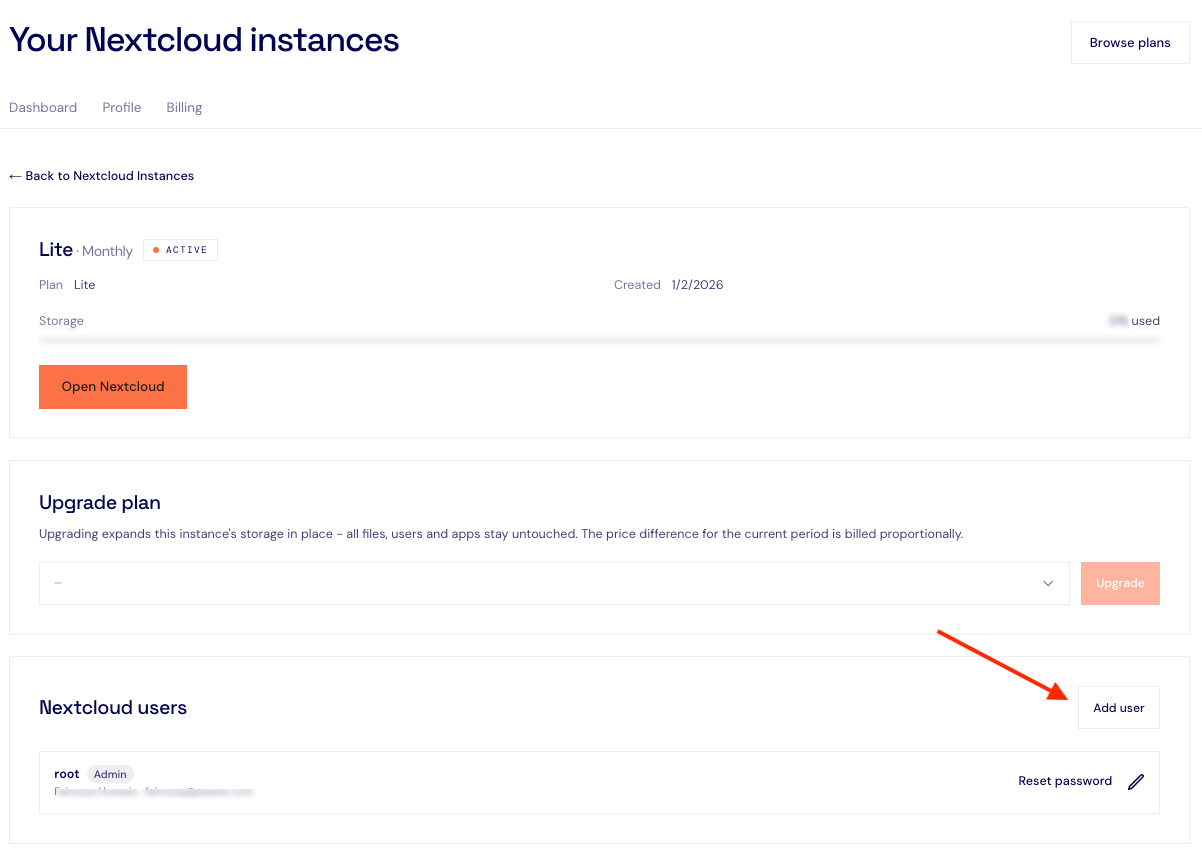
This opens the management page for your Nextcloud instance, where you can manage your plan, storage, and users.
Scroll down until you see the Nextcloud users section.
Here, you’ll find the Add user button. Click it to create a new user.
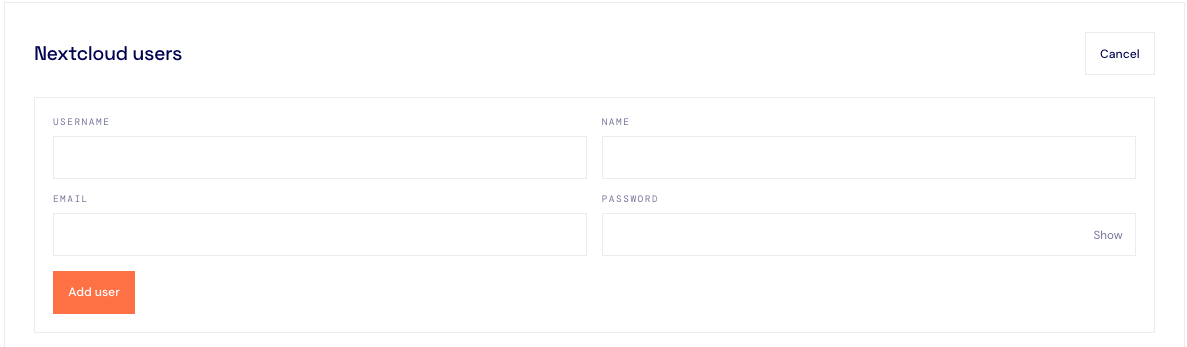
You’ll see a simple form with four fields:
Enter the details for the person you want to add, then click Add user.
That’s it. The new user is created and added to your Nextcloud instance.
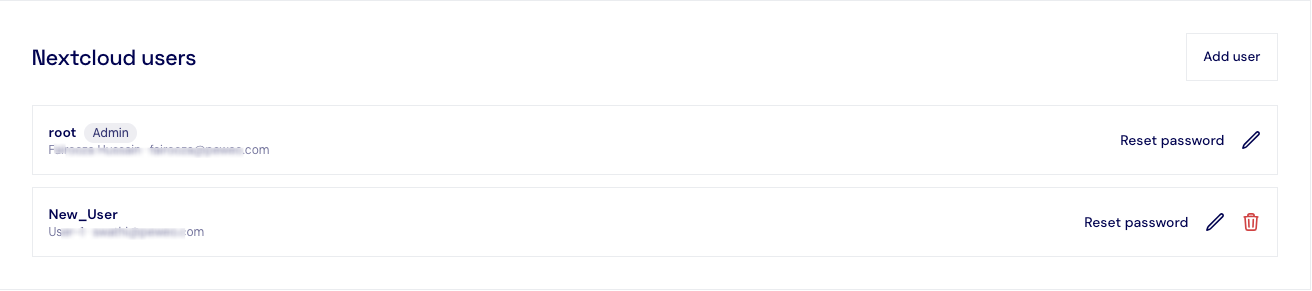
After adding a user, you’ll see them listed under Nextcloud users.
From here, you can manage your users, including editing a user, resetting their password or deleting them.
The number of users you can add depends on your CloudBased Backup plan.
And that’s really all there is to it. There’s no complicated user invitation process or multiple settings pages to work through. Just add the user’s details, click Add user, and you’re done.
If you prefer working directly inside the Nextcloud interface instead of the CloudBased Backup client portal, that option is always available. The underlying user management works the same way.
Start by logging into your Nextcloud instance as an admin. Click your profile icon and select "Users" from the dropdown menu. This opens Nextcloud’s built-in user management screen.
At the top of the page, you will see the form for creating a new user. Fill in the following:
Username - This is the login name. Keep it simple and consistent with your team's naming conventions.
Display Name - The name that shows up in shared files, comments, and other collaborative features.
Password - Set an initial password. The user can change it after their first login.
Email - Enter their email address so Nextcloud can send a welcome message and handle password resets.
Groups - Assign the user to one or more groups. Groups make it much easier to manage shared folders, permissions, and app access at scale.
Quota — Set a storage limit if needed. This is especially useful when you're managing a large team and need to keep storage usage in check.
Once saved, the user account is active immediately and ready to use.
You can absolutely self-host Nextcloud and manage users through the admin panel. Plenty of people do, and of course, it works fine.
But if you would rather skip the server maintenance, the security patching, the backup management, and the troubleshooting, that's exactly what we handle for you at CloudBased Backup.
With our managed Nextcloud hosting, you get a clean client portal where adding and removing users takes seconds. We handle the infrastructure, the updates, the backups, and the uptime monitoring. You can focus on your work.
And when questions come up around user permissions, storage quotas, or anything else, our support team is right there.
8 min read · 29.09.2026
9 min read · 22.09.2026
5 min read · 14.09.2026
Hosted in
Germany
4.3on G2